If you want a fast facelift for your bathroom, think about opting to replace your bathroom sink for an updated, fresh look. This is also a popular project to take on when you need to address other plumbing issues, including leaking faucets. If you’re willing to put in a little sweat equity, you can save hundreds of dollars by installing the sink as a DIY project, but you also assume all of the risk involved.
Bathroom sinks are available in many different styles and materials, which gives you the freedom to achieve nearly any look that you desire. Read on to learn more about the most common types of bathroom sinks, the average costs to purchase them and how to install one on your own. If you’re unsure of your plumbing skills, consider hiring a licensed plumber to help guide your installation project or complete it for you.
On This Page:
- Types of Sinks
- Should You DIY?
- Step by Step Guide to Sink Installation/Replacement
- Professional Sink Installation
- Other Projects to Consider
Types of Sinks
One of the best things about bathroom sinks is that they’re not strictly utilitarian, one-size-fits-all fixtures. There are many styles you can choose from to get the design look you love, but each particular type also presents its own unique installation or replacement requirements.
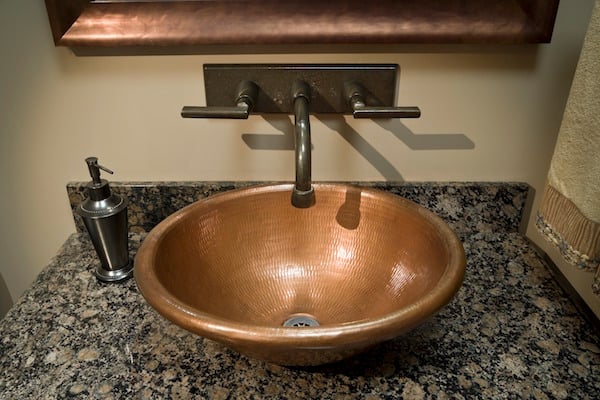
- Vessel sinks sit completely on top of your countertop, giving the sink a distinct look and a modern, spa-like feel in the bathroom. Vessel sinks are often made of delicate glass or vitreous china, which look gorgeous but lack the durability of other materials. Ceramic or china models cost about $100 on average, and glass varieties range in cost from about $150 to $300.
- Drop-in, or surface mount sinks are easy to install because they slip right into the counter. They feature a rim around the perimeter to hold the sink in place. Because of the wide variety of materials used to make these, costs can range from $40 for a basic china model to more than $1,000 for large copper and bronze styles.
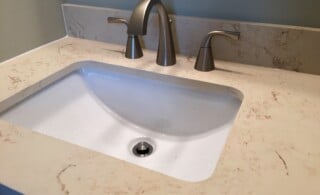
- Undermount sinks have a nearly seamless look because they don’t have a lip. These sinks are mounted from under the counter and they get sealed with leak-proof silicone caulk. They require more time to install than drop-ins, which translates to higher installation costs or a longer time spent DIYing. Like drop-ins, their costs depend on materials, with lower-end vitreous china designs costing as little as $50 or $60 and elaborate bronze models costing upwards of $900.
- Pedestal sinks are free-standing sinks that offer a vintage feel, but they require you to sacrifice cabinetry and valuable storage space. Expect to pay $450 or more for this type, depending on how intricate its design is.
Common Sink Materials
You can choose a material that works with the other design elements in the room, or opt for something unexpected to give your bathroom a pop. Common sink materials include:
- Composite: Among the most durable options, composite resists chipping, but darker colors often show scratches. Composite sinks typically cost $300 to $600.
- Stainless Steel: Versatile and durable, stainless steel is often used in kitchens, but it can also show up in the bathroom. It’s easy to clean but shows water spots. Stainless steel sinks cost an average of $100 to $800.
- Quartz: Designed to match countertops, this material offers a sleek, modern look, but dark-colored quartz can show marks and the material costs significantly more than composite, with prices that average $800 to $1,200.
- Solid Surface: Durable materials and a variety of color options make this a popular option. The color runs through the whole sink, so scratches don’t typically show up. However, this material isn’t heat tolerant and it’s known to crack after heavy impacts. Additionally, solid surface sinks require professional installation, and average costs are between $2,100 and $3,400.
Should You DIY?
There are many different factors that you should carefully consider before you decide to take this on as a DIY project. For example, can you evaluate the condition of the existing faucet, drain, tailpiece and stopper to determine if they need replacing? Are you comfortable taking the pieces apart to examine the condition of these components?
To successfully install a new sink, you need to make sure you match the size and configuration of the sink to the water lines and the faucet so that they all all fit together correctly. If it’s a straightforward replacement, you’re likely capable of doing this as a DIY project. However, if you have to move pipes or update any plumbing, you’re better off calling a professional.
Ready to start your bathroom sink?
Find ProsReturn to Top
Plumbing Considerations
Although installing a new sink sounds like a “simple” job, anything that involves plumbing can become complicated very quickly. Small mistakes can lead to leaks. If you have an older home with old pipes, this is an ideal time to upgrade to new ones, which requires a plumber for retrofitting. The length of time that pipes last depends on what materials are used in their construction. For example:
- Brass pipes last 70 to 100 years
- Copper pipes last 50+ years
- Galvanized steel pipes last 50 to 75 years
- Cast iron pipes last 75 to 100 years
- PVC pipes last 100+ years
Time and Materials Needed
The amount of time that this project takes averages around a half of a day of actual work, with approximately 24 hours of downtime while the silicone caulking dries. The biggest component of the materials you need includes the sink and the installation kit. Make sure you choose a sink that complements the rest of your bathroom to give it a cohesive look. Other tools that you need include plumber’s wrenches and silicone caulking to seal all the gaps between the new sink and the vanity cabinet.
Step by Step Guide to Sink Replacement and Installation
Average Time for this Project: Six to eight hours of hands-on work and 24+ hours of inactive time
Although installing a new bathroom sink is an easy and relatively inexpensive way to upgrade your bathroom, it’s not the most simple DIY project, particularly if you’re replacing an existing sink and vanity that require disposal. If you’re installing a new fixture, switching locations or going from a single sink to a double sink, you should really consider hiring a plumber to take care of any pipe installation and extensive plumbing work necessary. While the exact instructions for installing may vary slightly depending on the type of kit it uses, this step-by-step guide provides a reasonable idea of what to expect when you remove your existing sink and replace it with a new one.
Necessary Tools and Materials
- Putty knife
- Silicone caulking
- Basin wrench
- Plumbers’ wrenches
- Plumbing sockets
- Sink and installation kit
Step One: Measure the Existing Sink and Vanity
In the most simplified version of this project, you buy a new sink that has the same measurements as the one that you’re replacing. If you’re looking at models that are larger or smaller but aren’t replacing the vanity, be sure to measure the available space to find a new sink that fits.
Step Two: Buy a New Bathroom Sink
One of the most fun parts of this project is shopping for your new sink. With all of the different options out there, you should be able to find one that meets your design goals. Note whether it comes with a faucet and all necessary hardware or if you need to buy those elements separately.
Step Three: Turn the Water Off and Begin
Before you get started, turn the water supply off at the valves, which are usually located below the sink. If you can’t find the valves, or if turning them off doesn’t shut off the water, look for the main water supply to the house. You can typically find this near your water meter. Test the faucet before you proceed to verify that no water comes out and to release any remaining water pressure.
Step Four: Remove the Old Sink
Open the doors of the vanity cabinet so that you have access to the under-sink area. Loosen the nut that holds the P-trap on the drain using an adjustable wrench. Catch any water that comes out of the drain by placing a small container under the drain as you remove it from the P-trap. Use a crescent wrench or locking pliers to disconnect the water supply and drain lines from the faucet before sliding a putty knife into the area where the cabinet and the old sink meet. Run the knife around the perimeter to loosen the seal; alternatively, remove any screws or clips holding the sink to the base cabinet. Pull the old sink and counter off the base and set them aside. Use the putty knife to remove any remnants of caulking from the wall and fix damaged paint before starting the installation of the new fixture.
Step Five: Examine the New Sink
Avoid getting halfway into the project before you realize that you’re missing a tailpiece or you need to cut an opening. Measure the new sink and look at the template that came with it to make sure the one fits and the faucet and drain holes align with those in the existing area. Otherwise, you might need to cut the opening to fit the new sink. Additionally, make sure you have a drain and tailpiece for the sink, both of which often come with a new faucet. Additionally, verify that the faucet’s supply lines match up with the valves under the sink.
Step Six: Mount the New Sink
Move the new sink into place and apply a thin bead of silicone caulk along the bottom lip. Place the sink into the hole in the cabinet and smooth the silicone line as needed. Depending on the way the sink is designed, you may need to perform extra steps. For example, to install in a granite counter, you typically need to pre-drill holes using a diamond carbide bit, but if you’re installing an undermount sink, you might only need to caulk and install connecting clips. Always follow the manufacturer’s instructions for safe, secure installation.
Step Seven: Install the Faucet
Screw the faucet onto the faucet assembly. Use silicone caulking or lock nuts to secure the faucet to the sink according to the manufacturer’s instructions. This can often be completed before you install the new sink. If you choose to install the faucet afterwards, be sure that the space for the faucet and the location of the sink match.
Step Eight: Install the Drain Kit
The exact installation process depends on what comes with your specific drain kit. In general, you need to place the tailpiece into the sink and pull it through. Secure it by screwing the tailpiece nut on the underside. Install the included gasket, washer and locknut to secure the tailpiece. Alternatively, add silicone caulking to create a tight seal.
Step Nine: Finish Things Off
Make sure your water lines and the new fixture are a match. If they don’t match, you need to get matching lines that you can splice together using teflon tape. Connect the water supply lines by screwing them into place; make sure there are no kinks before tightening them by hand and using a wrench for a final half turn to tighten the connection. Connect the drain stopper by sliding it into the tailpiece and tightening it so that it doesn’t wiggle. Apply a finishing bead of silicone caulk along the top of the sink along the area where it meets the wall and in any gaps. Let the silicone caulk dry for at least 24 hours. Turn your water supply back on if you turned it off to the whole house, but don’t use the new sink for at least a day.
Step Ten: Check for Leaks
Once the caulk is dry, turn the water supply back on if you turned it off at the sink. Check the faucet to make sure it works without leaking. Also check all of the rubber connections, the gasket under the tailpiece and the drain to make sure there are no leaks. If the rubber connections are leaking, tighten them more. If the drain leaks, install a new, hand-tightened washer. If the gasket leaks, tighten the nut further or add silicone caulk to seal it.
Ready to start your bathroom sink?
Find ProsReturn to Top
Professional Sink Installation
Given the complexities of this project, you shouldn’t try to cut corners just to save on installation costs. If you’re a seasoned DIY specialist, this might be a simple installation. For most homeowners, letting a professional do the job makes good sense, too. Some potential pitfalls that can happen if you install a new sink on your own include:
- Upgrading to a deeper sink without measuring the tailpiece, which can interfere with drainage
- Failing to measure to make sure it covers the hole in the existing countertop, which leaves unsightly gaps
- Missing telltale signs of water damage on the countertop, which could prevent the sink from sitting flat on the counter
Don’t try to complete the job too quickly unless you’re certain you can handle this project. After all, a new sink should last for many years to come. Additionally, if you choose to sell your home in the near future, properly installed updated sinks and fixtures are a big selling point for prospective buyers.
Cost to Hire a Pro
The national average for sink installation is $496, but many different factors affect the price. For example, removing and disposing of an existing sink can cost an extra $20 to $100. In general, professional sink installation can cost anywhere from approximately $178 to $1,410, depending on how extensive the project is, the type of materials used and the way that the sink is mounted. For example, consider the average prices of the following:
- Tile Sinks: Because these typically require extensive preparation and tile setting, installation averages $386
- Metal Sinks: These durable options are available in a variety of styles and typically are among the least expensive to install, with rates averaging $178
- Porcelain and composite sinks are popular options available in several mounting styles:
- Mounted Sinks: Without the need for the support of cabinetry, your installer needs to make sure the wall is sturdy enough to carry the weight of the sink. This process can contribute to the installation costs, which run around $211 on average
- Surface Mounted Sinks: Typically made of porcelain, this style requires minimal fuss, which is reflected in installation costs that average $194
- Undermount Sinks: These require more work to install and cost more, with average installation rates of $229
Questions to Ask a Potential Contractor
If you decide to hire a contractor for this project, research several options before choosing one. Ask friends and neighbors for referrals and get estimates from at least two or three contractors to get the most competitive bids. Some of the key points to ask prospective tradespeople include:
- Licensure: Most states require plumbers and contractors to have licenses. Ask for a copy and call your state or county’s business department to verify that it’s active and there are no complaints against it.
- Experience: Be sure that the contractor or plumber has experience in installations, not just repairs.
- Insurance: Always go with an insured professional. Insurance protects you if something goes wrong during the project.
- References: Ask for personal references. Call previous customers. Do whatever you need to do to get a feel for how the professional works and how happy his or her past clients were with the work.
- Rates and Time Estimate: Don’t be shy. Ask the professional how he or she charges, how long he or she estimates the job will take and how many additional workers he or she might bring along.
Other Projects to Consider
Depending on the condition of your bathroom, you might want to use this opportunity as a springboard to tackle several projects at the same time. For example, update the lighting fixtures to highlight your new fixture and freshen up your bathroom. Take a look at these considerations that you might want to combine with your sink installation project.
Counter Replacement
If you have a standard bathroom counter, upgrading this along with the sink provides a dramatic facelift for the room. Vanity tops are commonly sold in most home improvement stores. They typically come in two depths, 19 or 22 inches, and standard widths ranging from 17 to 73 inches. Custom sizes accommodate bathrooms that need something larger. Consider the color and material of your new sink before choosing a vanity top. Common counter materials include:
- Granite offers beauty, durability and minimal maintenance. Average granite countertop costs range from $75 to $300 per linear foot.
- Quartz is another sleek, durable option. Average costs range from $110 to $250 per linear foot.
- Tile looks great but comes with the added work of cleaning the grout lines. Tile costs an average of $2 to $75 per tile.
- Solid surface gives you the look of high-end materials, and this costs $75 to $150 per linear foot.
Should You Get a New Faucet?
Just like replacing the counter, installing a new faucet completes the look of your bathroom sink. Think of the faucet as bling for your bathroom, and look for something that works with the other fixtures in the room while giving the sink an attractive finish. Choose from three main types of faucets based on the number of hole openings:
- Single-hole faucets typically have a single handle, and some feature a bottom plate to retrofit them for a three-hole sink. These faucets work best for smaller sinks and simple designs.
- Centerset faucets are popular options for three-hole sinks. They work on nearly any bathroom sink, and they come with a single handle or two handles mounted on a bottom plate.
- Widespread faucet mounts come in three pieces: a spout and two handles. The distance between the handles is 8 inches or more (roughly twice the standard for centerset faucets) and the fixtures are often larger than more-standard faucets.
- Wall-mount faucets work well for vessel or freestanding sinks that require long spouts.
To choose the perfect finish, visit a showroom to see all the different options available. Polished finishes add an upscale look, but they need frequent maintenance. Brushed finishes hide smudges and water spots.
Replacing the Vanity/Cabinets
From stock vanities with integrated cabinets and drawers for storage to custom cabinetry that delivers a high end look, changing the vanity or cabinets in your bathroom makes a significant impact on the look and functionality of the room. Installing new cabinets can run anywhere from $200 for a modest vanity to $13,000 for a large custom job. Wood cabinets are the most popular material, but laminate and thermofoil provide an attractive look at a lower price point.
Ready to start your bathroom sink?
Find ProsReturn to Top
 Tub and Stall Shower Installation
  Removing Bathroom Fixtures When Remodeling
  Dual Flush Toilets
  Guide to Converting a Tub to a Shower
  8 Water-Saving Home Renovations

Are You Familiar With This Topic? Share Your Experience.