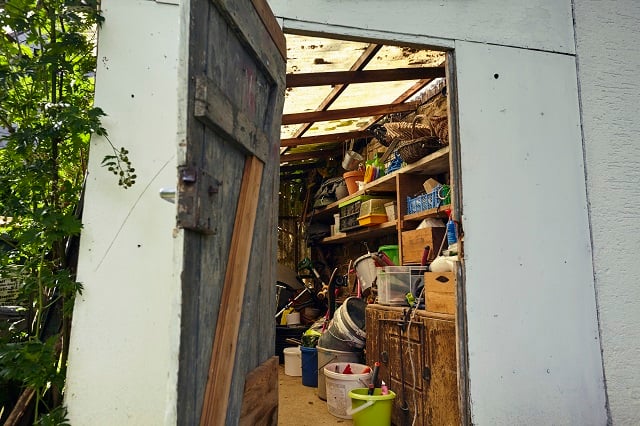
Decluttering is a trend that many homeowners have dived into over the past few years, and for good reason. Tidying up a messy yard will liberate you of physical and emotional junk that’s taking up precious space on your property and in your life. Here is your step-by-step guide to decluttering your messy yard once and for all.
Step 1: Get rid of the big stuff
Take a look at your whole yard with a critical eye. Getting rid of large items is the easiest way to make a noticeable difference. Identify large items that you no longer want or need, such as a patio set you don’t use anymore or a run-down outdoor storage bin. If you don’t mind their look and simply need to reinvigorate them, set them aside to be pressure washed and maybe even painted.
Not sure if you want to get rid of something? Ask yourself these questions:
- When was the last time I used this?
- Do I have a duplicate that I use more often?
- Does this hold sentimental value?
- Did I remember I had this, or had I forgotten about it until finding it today?
- Does this bring you joy to have or see?
(You may spot small items you’re ready to part with, but hold off on dealing with them — we’ll get to those belongings in step two!)
Once you’ve decided which items you’re getting rid of, clear them out of your yard as soon as possible by donating, recycling or throwing them away.
- If you don’t have a way to transport them, hire a junk removal company to haul away items you aren’t donating.
- In most areas, organizations like Goodwill and the Salvation Army will pick up large items for donation.
You can also host a garage sale, use a resale app, or list your items on Craigslist or Facebook Marketplace to sell them to the highest bidder.
Even though it may not feel like a big accomplishment, eliminating your large purgeable pieces checks a big task off your to-do list. You’ll clear out space and feel a sense of accomplishment that inspires you to move on to the next step in your decluttering efforts.
Step 2: Purge small items
Once the big stuff is out of the way, it’s time to move on to the small items. This can be tedious since there are so many of them. But, with an organized plan, you can get through this step quickly.
An effective and popular strategy is to declutter by category instead of by area. For example, rather than tackling all the items stored in your shed, go through your tools first — even if they’re kept in multiple areas of your yard — and then move on to gardening supplies. Try sorting through:
- Tools
- Gardening supplies
- Furniture and cushions
- Lawn ornaments
- Pool supplies
- Fire pit/fireplace tools
- Children’s toys
When reviewing your inventory of each category, put every item in one of three piles:
- keep
- donate/sell
- discard
When deciding whether to keep or part with an item, ask yourself those questions we listed above. Avoid making a maybe pile. Only resort to this option only if you truly have a lot to go through. Remember, you’re trying to get rid of things that no longer hold functional or emotional value, so it’s best to make definitive decisions.
What if I still can’t decide what to do with something?
Don’t feel pressured to make a hasty decision. Instead, set it aside, and come back to it when you’re done with everything else in the category you’re working through. Once you’ve taken decisive action on other items, it will be easier to return to iffy belongings and determine whether they still have a place on your lawn.
Step 3: Create a layout for your decluttered yard
Now the fun begins: designing your clutter-free outdoor space! Whether you want a carbon copy of your original layout or a fresh, new style, the key is making sure everything that survived your tidying session has a permanent home in your design.
Tackle each section of your backyard individually. Choose one main piece as a focal point for each area, and then center everything else that will go there around it. For instance, make your patio table the star of your deck, and arrange decorations and potted plants around it. The areas you may want to focus on include:
- Deck, porch, or patio
- Storage shed(s)
- Garden
- Greenhouse
- Pool area
- Fire pit/fireplace area
- Children’s play area
Keep in mind that while it’s fun to look at home design websites and magazines for inspiration, your yard won’t look exactly like the photos you admire. Draw a simple diagram, or place a key items in their new designated spaces. That way, you’ll get an idea of how your yard will look, and you can adjust.
Step 4: Arrange your yard according to your design
Now that you know where everything will go, you’re ready to physically arrange your decluttered yard. The trick to keep yourself from backsliding and accumulating clutter is to make sure every single item has an accessible home. You’ll enjoy returning to where your favorite gardening gloves are and seeing them there not covered in dirt nor buried by potting supplies. If you find it difficult to dedicate a place for a given belonging, reconsider whether you’re better off donating or discarding it.
Step 5: Add new storage pieces as necessary
You didn’t do all this hard work only to have it undone by a lack of storage space. To keep your yard from becoming cluttered again, you may need to add new storage. But don’t use this as an excuse to hang onto stuff you don’t need! Instead, focus on honoring the items you truly want and need.
For instance, if bags of mulch and fertilizer were strewn along the fence before, a storage chest that holds them and sits next to your lawnmower is a smart investment—or lay the mulch down in mid to late spring.
Here are some creative storage solutions for your garden clutter:
- Install a hose hanger
- Access and use the space under your deck
- Buy storage patio furniture
- Camouflage garbage and recycling bins with tall grasses
- Use a bike box or toy tent
- Display stacked firewood or use it as a temporary barrier
- Use empty planters to store garden tools
If you need a significant amount of extra space to hold bulky belongings, like lawn equipment or furniture that gets stored during the winter, consider putting together a prefab garage or hiring a local shed builder. Again, the point of your project is to declutter, so you shouldn’t add more stuff to an already-full basement or garage.
Step 6: Add finishing touches
Once you’ve wrapped up your decluttering and reorganization tasks, it’s time to add the final touches to your masterpiece. Tidying up the remaining details of your outdoor space will truly showcase all your hard work and will motivate you to keep it in good shape. These are the final tasks of your yard-decluttering mission:
- Clean up your lawn. If your new layout exposed dead or bare patches in your grass, hire a landscaper to fill them in.
- Spruce up your garden. It may only need weeding (even gardens sometimes need decluttering!), but if it could use some serious TLC, hire a gardener near you to revive ailing plants or add new blooms.
- Repair or refresh items that look worn. If your outdoor furniture, fencing, or decor has seen better days, give it new life by washing it, fixing it or making it over.
Decluttering every room inside your home may be all the rage, but there are serious benefits to making the same effort in your front, back, and even side yard. By following these six steps, you’ll have fewer unwanted items to keep track of — and a more spacious and organized outdoor living space to enjoy.
 Raising Chickens at Home
  Spring Garden Flower Tips and Suggestions
  Plan Ahead for a Better Yard
  8 Water-Saving Home Renovations
  How Much Does it Cost to Install or Assemble Fitness Equipment?

Are You Familiar With This Topic? Share Your Experience.