From moisture removal to odor control, bathroom fans perform several important functions that enhance the quality of the air in your home. Modern units come in a variety of styles, some of which don’t even look like fans, and they operate quietly and efficiently to exhaust humidity and heat, keeping your home comfortable. Although homeowners with some carpentry and electrical experience can approach this as a DIY project, if you’ve never worked with electrical equipment before, you should hire a professional to make sure everything is installed correctly.
On This Page:
- Types of Bath Fans to Consider
- Step by Step Guide to Replacing a Fan
- Sizing Considerations
- Replacing vs. Cleaning a Fan?
- Other Considerations
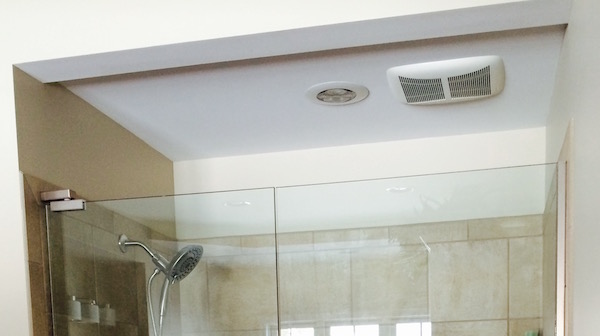
Types of Bath Fans to Consider
Your local lighting shop or home improvement store should have several options for you to peruse. To choose the right model for your bathroom, consider the size of the room, the vent method and any bonus features. Bathroom fans typically come in three sizes based on the square footage they can handle. For example:
- Small bathroom fans can ventilate up to 70 square feet, making them ideal for use in a small bathroom
- Medium bathroom fans work well for rooms between 70 and 100 square feet
- Large bathroom fans can ventilate more than 100 square feet of space
Size isn’t the only consideration. Bathroom exhaust fans also come in three mounting styles, including ceiling mounts, ceiling/wall mounted, and wall mounted. While some models are sleek and simple with a utilitarian design, others have an integrated decorative light that looks more like a flushmount ceiling light than a fan.
Step by Step Guide to Replacing a Fan
Average Amount of Time to Complete: Less than one day
Installing a new bathroom fan does require some carpentry and electrical skills. Check with your local state or county government to determine if you need a permit to complete the necessary electrical work involved in this project. You need hand tools, a cordless drill and a jigsaw to saw through the drywall if necessary. You also need protective eyewear and a drop cloth to protect the floor from scratches and debris.
Necessary Tools and Materials
- Stepladder
- New vent fan
- Wire connectors
- Roof cement
- Roof cap
- Mounting brackets
- Wire connectors
- 4-inch flexible insulated duct
- 4-inch aluminum ducts, both straight and elbow
- 6-inch adjustable clamps
- 3/8-inch self-tapping sheet metal screws
- 1/2-inch self-tapping sheet metal screws
- 4-in-1 screwdriver
- Cordless drill/driver
- Drywall saw
- Pry bar
- Jigsaw
- Hammer
- Non-contact voltage tester
- Utility knife
- Chalk line
- Dust mask
- Goggles
- Flashlight
- Gloves
- Dropcloth
Step One: Turn Off the Power
Prevent the risk of shock, burns and fire. Whenever you work on electrical systems, you need to turn the power to the room off at the circuit breaker. Remove the cover from the old bath fan and test it with the voltage tester to make sure there’s no electricity current running through it. Spread the drop cloth over the floor to avoid scratches or damage if anything falls during the process.
Step Two: Remove the Old Fan Motor
Examine the old motor assembly. Remove any screws holding it in place before prying it out using a screwdriver for added leverage. Protect your eyes with goggles, and watch for any falling debris. Unplug the motor and remove it from the fan’s housing. Keep an eye out for any clips that might be securing the motor in place, and wear gloves to protect your fingers from potentially sharp edges. Locate the electrical connections, which are typically in a small box. Use the voltage tester to make sure there’s no electrical current before disconnecting the wires.
Step Three: Remove the Old Fan Housing
Take your cordless drill, utility knife, snips, wire cutter and stripper, screwdriver and a work light into the attic. Locate the fan housing and begin pushing insulation away from it as needed. Unscrew any screws securing the housing to a joist using the power drill, and remove the old housing.
Tip:If you notice dull gray wiring instead of dull orange wires, call a licensed professional who is certified in working with aluminum wiring.
Ready to start your bathroom fan?
Find ProsStep Four: Prepare the Area
Unless the housing of the new fan is the same size as the old one, you’re going to need to do a little basic carpentry. Trace the outline of the new housing over the old one using the chalk line. Use the saw to enlarge the hole in preparation for the installation.
Return to the bathroom and set up the stepladder. Place the base of the new fan’s housing on the ceiling and trace the outline. Cut the hole to enlarge it, or patch the ceiling with drywall if the new fan is smaller than the old one. Cut one piece of insulated flexible duct 24 inches longer than the old one. Cut a piece of the 4-inch-diameter aluminum ductwork so that it’s 6 inches long. Take both pieces back into the attic, along with mounting brackets, the aluminum elbow, sheet metal screws, electrical cable staples, duct clamps, electrical clamps, caulk and the new fan.
Step Five: Install the Fan
Slide the mounting brackets on the fan and extend them to reach the joists. Line the fan up with the new hole that you cut and ease it down through the hole. Ideally, you should have a helper on hand who can hold the housing snugly to the ceiling while you secure it. Keep the housing level and drive screws through the mounting holes to the joists.
Step Six: Run the Ducts
Replace the ducts by attaching an aluminum elbow to the fan’s exhaust port. Then, attach the duct liner to the elbow. Run the duct directly to the roof opening without stretching it too tightly or allowing it to kink. Use the fewest turns possible. Cut the duct to the right length and connect it to both aluminum ends.
Step Seven: Connect the Wires
Complete the wiring, from above in the attic or from below in the bathroom, depending on how the fan is set up. Clamp the electrical cable to the fan’s housing, leaving about 6 inches of wire in the box. Use a wire stripper to strip 5/8-inch of the insulation off the end of each wire. Connect the wires and staple the cable to a framing member no farther than 12 inches away from the cable clamp. If you’re unfamiliar with electrical work, it may be best to call a licensed electrician to complete this step. Additionally, if you decide to do it yourself, call a local electrical inspector to make sure you’ve completed the work correctly.
Step Eight: Seal the Perimeter
Use flexible caulk to seal the area around the edge of the fan. This helps keep things quieter in addition to preventing air leakage through any gaps. Replace the insulation and cover the new fan’s housing. Gather all the tools you brought up with you before you head back down to the bathroom.
Step Nine: Complete the Roof Work
Stand at the hole in the roof and pull up on the angled end of the straight duct to leave 3/4-inch above the surface of the roof. Screw that portion to your roof’s sheathing using 1/2-inch sheet metal screws before caulking the area between the roof shingles and the duct to seal it.
Go out on the roof and replace the old vent cap with a new vent cap, being careful not to damage your roof shingles with the brittle old roof cap. Use a saw to make the previous hole large enough to fit the new 4-inch duct before reaching through to pull the duct up and through the roof. Keep the angled end of the duct approximately 3/4-inch above the surface of the roof. Secure the duct to the sheathing with screws and caulk around the edges to prevent condensation from causing any moisture damage. Install the new vent cap after checking to make sure the damper and screen are in place.
Step Ten: Finish the Job
Return to the bathroom to install the new fan’s decorative grille. Turn the power back on at the circuit breaker, and then turn the fan on to make sure it’s working correctly. If it sounds loud, turn the power off and make sure the mounting is secure and level. If it sounds quiet, install the mounting springs and put the decorative cover in place.
Sizing Considerations
To choose the most effective and efficient fan for your space, avoid getting one that’s too big or small. Start by considering the size of your bathroom. When you’re looking at size, you really want to measure the airflow capacity, which is expressed in cubic feet per minute (cfm). The general rule as determined by the Home Ventilating Institute suggests that a bathroom fan should have 1 cfm for every square foot of space on the bathroom floor. For example, if your bathroom is 9 feet by 10 feet, you have 90 square feet of area and you should have a fan with at least 90 cfm.
For bathrooms with more than 100 square feet of area, adjust the size by adding 50 cfm for each bath, shower and combination. Add 100 cfm for each whirlpool and 50 cfm for each toilet. If you’re experiencing moisture problems despite having a bathroom fan, you may need to upgrade to a model with a bigger cfm rating. Additionally, fans measure the amount of noise they make in sones. Choose one with a lower sone rating for quiet operation — those rated at 1.0 sones or less are the quietest.
Replacing vs. Cleaning a Fan
Does your existing bathroom fan seem to be lacking efficiency? Before you upgrade to a new or larger model, try giving it a good cleaning. Signs that a cleaning is needed include:
- Accumulated debris on the decorative grille
- Sudden decrease in effective air circulation
- Loud operation
Bathroom fans should be cleaned twice yearly to remove dust, grime and allergens that collect on the outside of the grille and the inside of the housing. To clean a bathroom fan, turn the power off at the circuit breaker and remove the cover from the ceiling. Place the cover on a towel and vacuum over both sides using a brush attachment. Use your vacuum’s dusting attachment and/or crevice tool to clean the inside of the housing and motor. Place the cover back on, turn the power back on and test the fan’s operation.
Ready to start your bathroom fan?
Find ProsReplace the Fan
If you’ve cleaned the fan and it still isn’t working well, then it’s time to look at an upgrade or a replacement. Other signs that point toward replacement include:
- Loud operation: Bathroom fans come with a variety of noise levels, with some operating at whisper-quiet levels. Look for models with the lowest sone rating. If your current fan gets increasingly louder even after cleaning, the motor may be burning out.
- Cracked exterior: With age, some of the cosmetic elements inevitably begin failing. If you start noticing problems on the outside, the inside is probably aging, too.
- Dated look and functioning: Increased energy efficiency and a wider range of attractive designs make replacing that old fan a smart option.
Other Considerations
Bathroom fans are important to the overall health and wellbeing of your household. Efficiently removing moisture from the air helps reduce the likelihood of developing mold and mildew in your home. To make sure you’re getting the most out of your new fan, consider a few of the following important points.
Replacing Ductwork
Periodically inspect the ductwork for signs of damage, kinks in the duct, blockages or connections that have loosened. Any problems with the ductwork can prevent the fan from operating correctly or allow moisture to escape into the attic. If you’re replacing an existing fixture, it makes good sense to replace the ductwork as well.
Most modern fans are compatible with 4-inch ductwork. Attach it to the fan’s port and run the ductwork to an opening in the roof. Make sure you keep the ductwork as straight as possible without having it pulled taut to increase efficiency.
Proper Ventilation
It may seem tempting to allow the air from the bathroom to just vent into your attic, but doing so is a recipe for disaster. Allowing the humid air to accumulate in your attic puts the room at risk for developing mold and mildew. Building codes require that bath fans be vented outside, preferably through the roof, although venting through a wall can work, too.
Repairing the Wall/Ceiling
If your new fan is sized differently from the old one, or if damage occurs during the replacement process, hang or patch drywall in the area to repair large holes. If the damage is extensive, hire a professional to make sure it’s repaired seamlessly.
Additionally, if your old fan wasn’t working efficiently, mold and mildew may have damaged your walls and ceiling. Take care of small, moldy areas in three steps:
- Remove any affected caulking
- Clean the walls and ceiling with a mold-killing cleanser such as hydrogen peroxide or bleach. Don’t mix the two products.
- Open the window and doors and run the new bathroom fan to help dry the area.
Large-scale problems may require tearing out walls. If the affected area is larger than 10 square feet, or if the mold and mildew are creeping into the wall, consult a local mold removal and remediation company.
Ready to start your bathroom fan?
Find ProsReturn to Top
 How to Repair, Replace and Install Bathtub Faucets and Shower Valves
  A Guide to Building an Affordable Kitchen Island
  DIY Guide: Replacing a Washer Pump
  Building a Pergola: A Guide to Building Your Own or Hiring a Pro
  How to Hide Pesky Carpet Seams

Are You Familiar With This Topic? Share Your Experience.