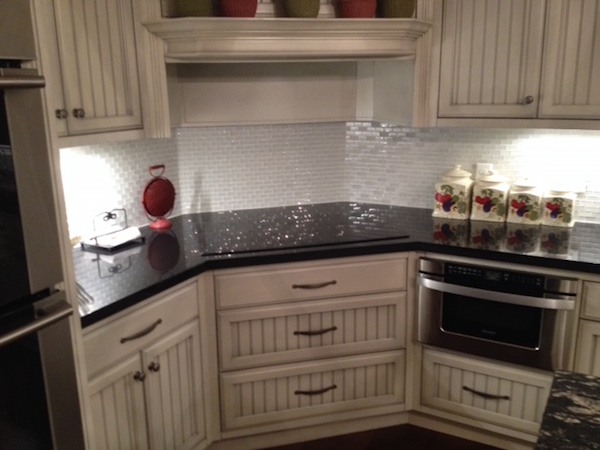
Beadboard paneling is one of the most popular decorative paneling materials on the market today. It gets its name from the distinctive grooved “bead” that is milled into its surface at regular intervals, and is most often installed as a decorative wainscoting to add texture and contrast to a living area.
Beadboard Design
Unfortunately, many homeowners dismiss beadboard because of its reputation as a less formal paneling choice. It’s true, beadboard in natural wood hues does add a more rustic, informal feel to areas where it’s installed. But in this day and age of kit homes and cookie cutter designs, beadboard also carries with it an aura of originality and craftsmanship that is hard to find in more contemporary building materials. Also, keep in mind that the level of informality varies greatly depending on the type of wood you choose for your beadboard paneling, and how you choose to finish it. Installing unfinished pine beadboard is going to give a room a rustic, western feel. On the other hand, a professionally finished, oak, cherry, or maple, beadboard wainscot can rival any material in formality, class, and beauty.
Paint Your Beadboard Panelin
Another popular choice for finishing beadboard paneling is to paint it. You’ll still enjoy all the decorative benefits of installing wainscoting, but it will be much easier to incorporate the beadboard paneling into your home’s original color scheme. And from a budget perspective, choosing to paint your beadboard can significantly reduce the cost of your paneling. You can purchase lower grade wood since the paint will hide any aesthetic imperfections, and if you’re not into home improvement projects, you can purchase pre-painted beadboard paneling (usually in white) directly from a supplier. Pre-painted panels make installation as easy as opening up the package and nailing your beadboard to the wall.
Ready to start your beadboard panels?
Find ProsInstallation Basics
Once you’ve got your beadboard on site, putting it up is relatively easy (though it can be time consuming depending on how much space you’ve got to cover). With pre-manufactured beadboard paneling, it’s as simple as nailing the panels to the wall in succession. The panels should fit together easily where they come into contact, though be sure to leave a small gap between them to allow for expansion. Once all the paneling is up, add a strip of molding to the bottom and a chair rail at the top, and you’re good to go. If you went a little higher end and purchased your beadboard as individual boards, it’s just going to take you longer. The process is still basically the same, you’ll just have a lot more pieces to fit together and nail up!
Most homeowners are amazed what adding a little beadboard wainscot can do. Talk to a contractor experienced in installing beadboard if you’re unsure about doing it yourself, and enjoy the warmth and comfort it adds to any living space in which it’s installed.
 Decorative Moldings: The Perfect Cover-up
  Ceiling Mirrors – Considerations, Types & Options
  The Basics of Ceramic Wall Tile Installation
  Wallpaper Prep
  Coffered Ceilings Add Value to Home

Are You Familiar With This Topic? Share Your Experience.