Gorgeous modern countertops in your kitchen or bathroom may look challenging to complete yourself, but finishing with warm wood or cool concrete can be done by a DIYer with a little vision and know-how. Here’s an overview of how to install beautiful countertop options yourself.
DIY Concrete Countertops

Pouring a concrete countertop can definitely be a challenge, but planning your project carefully and not trying fancy effects can result in a great look without the stress.
You may have seen concrete countertop tutorials that require measuring your space and building a mold in the proper size first, which you then fill with concrete. While this is the traditional way to create concrete countertops, there’s an easier way. Apply a thin layer of concrete over an existing Formica or smooth tile surface to get the same great look without all the work of making — or having to lift — concrete slabs.
To do so, gather your supplies:
- concrete mix
- container to mix in
- painter’s tape to block off areas that you don’t want to cover
- sandpaper in various grits
- hand sander (if available)
- putty knives in small and wider sizes
- a drywall trowel
- concrete sealer
If you want to take advantage of the more trendy looks for kitchens and bathrooms, find a mix that’s specifically for countertops. You can find them in different colors, with aggregates for more texture or with additives, like polymers, to lend more strength to the finished product. These bags are typically available in small sizes and can be easier to work with than a full bag of concrete from your local home improvement store.
To make your concrete countertop:
- Sand the existing surface with a medium sandpaper so the applied concrete adheres well.
- Mix small amounts of concrete at a time, apply a thin layer to the countertop with the trowel.
- Shape the finished edges.
- Apply a second coat after the first coat has dried, or cured, for at least 24 hours.
- Sand the top once the second coat has dried for 24 hours.
- Seal the surface.
Don’t worry if they are not perfect; you can sand them to perfection at the end of the project. For now, just do your best to apply an even coat.
This step may take some time to complete as you’ll be creating the finished look of your countertop.
Finding the right sealer for a kitchen countertop can be a challenge. You might find some resources that recommend an acrylic or wax sealer, but these won’t keep out stains well. What you want is a penetrating sealer like that used on outdoor patios, but that is safe for use around food. These can be hard to find, but they are available.
After the initial seal coat, you’ll need to re-apply every 6 to 12 months to keep the countertop protected.
DIY Woodblock Countertops
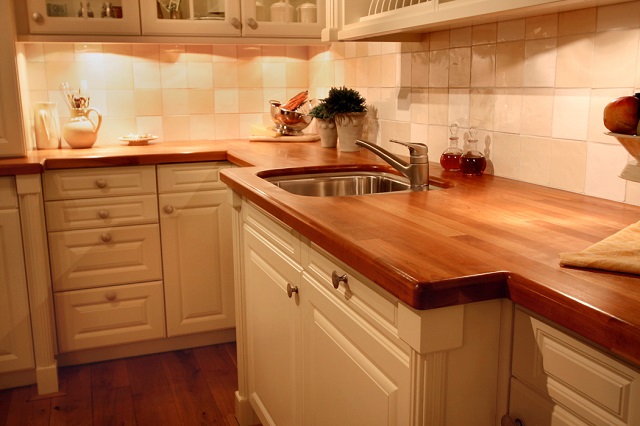
Woodblock and butcher block are other stylish choices for a kitchen or bath. You can buy already-made wood countertops, but making them yourself from lengths of maple or cherry can save you money.
Typical wood or butcher-block countertops can be designed in three ways: with the ends facing out (edge grain), with a longer piece in front (face grain) or by constructing small pieces together to form more complex patterns (end grain). Decide which type will look the best and be easiest for you to complete. With any style, you’ll need:
- wood pieces
- wood glue
- clamps
- sandpaper in various grits
- hand sander
- miter saws
- planer (if available)
You’ll need to make sure the wood pieces are similar sizes, and that may require cutting them to the same widths before you begin.
- Glue the wood pieces together in a block the size of your counter space using a waterproof adhesive.
- Clamp the wood block together as you work. Then, let the adhesive dry for at least 24 hours.
- Cut any excess off the ends so they line up properly. Use a hand sander or sandpaper to smooth the ends.
- (Optional) Plan the surface.
You may consider planning the top to get it perfectly smooth. If this isn’t in your realm of expertise, a local woodworking shop can do the planning for you. If you don’t do any planning, you’ll need to sand the top to get the surface smooth and uniform.
Wood countertops in the kitchen usually aren’t sealed — that can make the benefits of the wood surface for cutting go away. Instead, they’re oiled regularly. If you have small scratches or indentations, you can remove those with a fine grit sandpaper before you oil. Bathroom countertops can be sealed with a urethane to keep the water from doing damage.
Have any problems as you work, or think this is beyond your abilities? Find a professional to create your concrete or woodblock countertop. Learn more about the costs of countertop materials and installation.
 Concrete Countertop Calculator
  Cheap Kitchen Countertop Alternatives to Granite
  Marble Countertops
  Concrete Flooring – Solid as a Rock
  How to Choose a Concrete Contractor

Are You Familiar With This Topic? Share Your Experience.