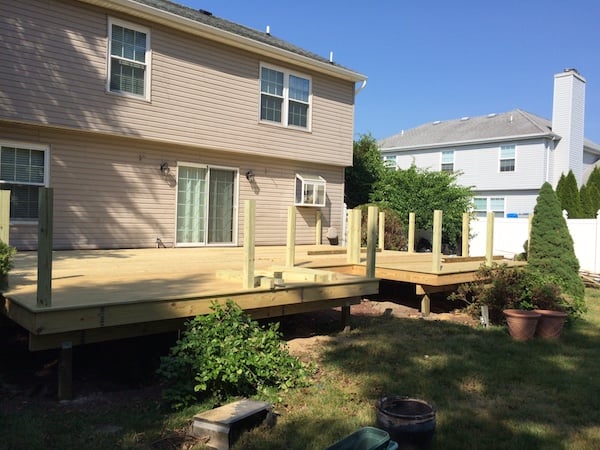
This is the first part of a three-part series to guide you through constructing a raised, attached deck. While we won’t specifically be covering floating decks, the basic processes are the same. This guide doesn’t work for covered front porches and grounded patio decks. We’ve broken this complex topic into three parts. This first part acts as an overview of the process with detailed instructions for planning and layout.
- Guide 1: Overview, Planning, Design and Layout
- Guide 2: Foundation, Posts and Framing
- Guide 3: Decking, Railings and Stairs
The average deck runs about $7,000. You can save most of that cost by putting in some serious time and sweat equity. A 12 x 24-foot one typically requires two people to complete and will take anywhere from one to three weeks depending on experience and skill level. A professional team can usually have the project done in a week or less. Building an attached deck is a complex construction project that can add a beautiful and functional outdoor living area when done correctly. When done incorrectly, it can cost you thousands in home repairs. Hiring a professional to consult or help with some or all of the steps can ensure a successful and safe installation.
On this Page:
- Outside/ Backyard Placement
- Designs & Features
- Wood, Composite or Vinyl — Choosing your Decking
- Tools & Materials
- Installation Instructions
- Step 1: Layout
- Step 2: Posts
- Step 3: Ledger Board
- Step 4: Framing
- Step 5: Installing Railing Posts
- Step 6: Laying Deck Boards
- Step 7: Building Railing
- Step 8: Adding Steps
- Additional Building Considerations
- DIY vs. Hiring a Pro
Outside or Backyard Placement & Dimensions
Size your deck to accommodate both your wish list and your budget. In most cases, a double patio door or back door is the best spot, but it really depends on the space you have. Know the size you want and then consider your space. In most cases, you’ll place it by a back or side door. This is also an excellent time to consider installing a patio door.
Sizing starts with understanding it’s function. Start a wish list, look through some of these deck design ideas and spend time exploring options and additions. To determine placement and size, ask yourself these questions:
- What time of day will it see most of its use? Place it on an eastern or southern side for daytime use, western or southern side for afternoon or evening use.
- Do you plan to entertain or is it just a relaxing oasis?
- Will you include an outdoor kitchen, hot tub or other space stealing amenity?
- Have you considered building a patio instead? Or perhaps a combination of the two?
Once you know what you want, size it to fit. Then look at the space around your home and decide where best to install it.
Easy Free-Standing Decks
Building a free-standing deck is a simpler and easier project for the DIY minded individual because of one huge advantage. It doesn’t require the removal of siding and properly attaching it to your home. This means it’ll require extra support posts. This can be an unwarranted challenge for someone who has only basic carpentry skills. Even with a small, free-standing deck you’ll need to check zoning laws to make sure you aren’t breaking any ordinances. This can affect everything from dimensions to the kind of wood you use.
The overall process is similar for both attached and free-standing structures. Modify the instructions below to mirror the support structures used on the outward facing sides of the deck in place of anchoring it to the homes wall.
Ready to start your deck project?
Find ProsReturn to Top
Patio Deck Construction Designs & Additional Features
Always start with a complete plan. There is nothing worse than finishing the project and having a “I should have” moment. Save yourself time and money by designing a deck that not only meets all your needs, but also includes all the features you want with room to grow. Consult with a designer or installation professional.
Additions to Consider
- Awning, Pergola, or Cover. Especially important in hot and sunny climates. Coverings can also be an addition put on later. However, consider additional weight when designing the support structure.
- Outdoor Kitchens. Kitchens range from a grill to a full service outdoor kitchen complete with bar, oven, refrigerator, etc. But they all take space, weigh more, often need utilities installed and must meet any local building code requirements. Outdoor kitchens cost most homeowners slightly over $10,000 to install.
- Pool Deck or Hot Tub. Above ground pool decks and hot tubs both take up a large amount of space and often require additional supports and curved installation.
- Other Water Features. Water features like an artificial waterfall will need plumbing and electrical run to them. Depending on the size, they may need additional supports. The price to have a fountain installed generally ranges between $1,000 to $4,500.
- Fire Pit. A great focal point for any deck. It must meet building and fire code requirements. For gas units, you’ll also need a line run under it. A great option to keep retain versatility is a portable fire pit or chiminea.
Deck Planning Steps and Tips

Once you have a promising idea of the direction you want to go, start planning by following these steps.
- Fully Understand Deck Construction. This is especially important if you plan to do this yourself. The instructions listed here assume you understand construction basics.
- Plan for amenities. Planning for adequate space to include a grill or hot tub while having plenty of seating is important to hash out early on.
- Determine your budget. Size matters, but not nearly as much as material type and configuration. The more complex the job, the higher the cost.
- Determine what materials are best for your climate and location. We’ll go into this in more detail below, but material choice determines price.
- Draw a plan. Don’t skip this. Have a diagram of lengths, amenities and any other additions you want. This will help with shopping or discussions with a contractor.
Ready to start your deck project?
Find ProsReturn to Top
Wood, Composite or Vinyl — Choosing your Materials
Deck material choice determines your budget, maintenance needs and the look. Which decking is best for your situation? Most woods and recycled composites are best for environmental responsibility when building a “green” deck.
- Pressure Treated Wood: $2.75 to $3.75 per square foot – By far the most common and least expensive choice – unless you install hardwood which can easily exceed $5.00 per square foot. Wood is versatile, looks great, and it’s cheap. But the downside is regular maintenance to keep rot at bay.
- Composite: $7.00 to $10.00 per square foot – Not cheap but very low maintenance and it won’t shrink or expand with humidity. Wood fibers and plastics mixed with glues under pressure to form composites. There are various levels of composite decking with varying levels of quality. Longer lasting varieties with better color blending tend to range at the higher end of the cost range.
- Vinyl/Plastics: $4.25 to $8.50 per square foot – Cheaper and lighter than composite but prone to expansion and contraction with the weather. Extreme heat can damage it; however, it is completely maintenance free.
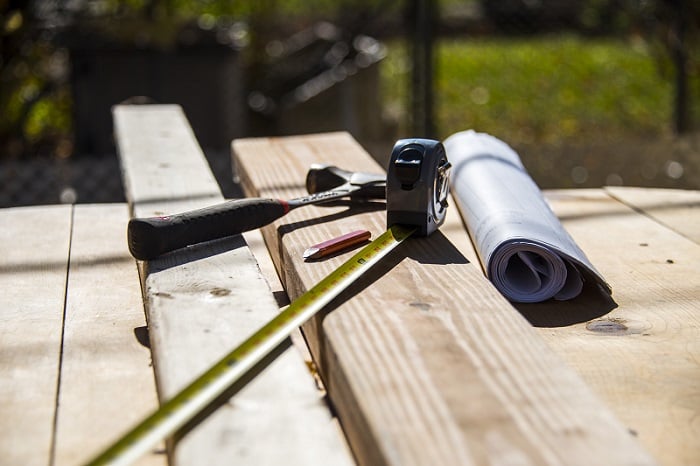
Building Tools & Materials
Most DIYers have a decent repertoire of tools at their disposal, but you should make sure you have the right ones specifically for deck building. Speak to your local contractor or the professionals at your local hardware store once you have a plan completed. Most large home improvement stores can create the shopping list you’ll need from the plan you have – some will even help you with the design.
Tools required:
- Level
- Carpenters square
- Tape measure
- Plumb
- Chalk box/chalk string
- Mason line & stakes
- Shovel & post hole digger
- Hand saw (at minimum – we recommend the saws listed below)
- Miter saw
- Drill or impact driver
- Speed square
- Hammer
- Wheelbarrow (for mixing cement)
- Sander
- Wrench
- Concrete footing framing tubes
Recommended Tools
If you don’t want the project to take weeks, add power. You can rent most of the following power tools from your local hardware store.
- Power augur
- Power miter saw
- Table saw
- Circular saw
- Reciprocating saw
- Deck screw gun (or driver attachment for a drill)
- Air compressor with nail gun
- Oscillating saw
- Flat bar
- Pipe clamps
- 4-foot level, 2-foot level, and torpedo level
Step by Step Installation Instructions
Once you’re ready with tools needed, follow these steps for easy installation. Always check all measurements throughout the project. Make sure all framing is plumb, level and square where necessary.
Step #1: How to Layout a Deck
- Create a Full design. Allow for all features you’ll want included from the list above.
- Create a written plan. Professional landscapers, contractors and even home improvement stores can help you create a blueprint. This will let you tackle design and space issues before starting.
- Measure the area. Mark the area with stakes. This is just a rough in to determine the approximate placement for the batter boards. You’ll make fine adjustments next.
- Make batter boards out of furring strips. This is just three pieces of furring tacked together to create a frame to hang string from. Place them outside the corners of your planned area. Larger decks will need additional posts marked with additional batter boards spaced along the outer perimeter. Check your design and local building code for specifics.
- Mark the outer layout with string. Tie strings to the batter boards to mark the outer edges of your deck. Make sure the strings are as close to level as possible.
- Adjust the strings as needed to square up the area. Your area is square when the diagonal measurements between the corners of the string are equal. Mark the final string locations on the batter boards.
- Remove any sod if code requires it. Rent a sod cutter to make the job go quickly.
- Determine you post layout along the strings. Layout will depend on your local building code and the size.
- Spray marking paint for footer locations. This marks the dig locations of your footers and posts.
Steps #2 – #4: Adding Posts, Attaching Ledger Board & Framing
To install the posts, you’ll need to remove the string from the batter boards and dig in the marked locations. Use premade footings or concrete forms to pour post footings and attach the posts to the footings with brackets.
Next comes the installation of ledger board, which must be done properly to avoid the water damage to your home. You’ll need to remove siding, attach the ledger board to the wall studs or sill plate with bolts. Add all flashing and waterproofing materials and then replace the missing siding.
Framing can be done a number of different ways. You can either install beams on top of or attached to the sides of the posts and then frame above these or install rim joists directly to the posts and skip using beams. Local code requirements will let you know if beams are required. Beams have the distinct advantage of allowing cantelivering or overhanging your deck joists.
For specific instruction, consult our detailed Framing and Post Guide.
Steps #5 – #8: Laying Deck Boards & Railing Posts, Building the Railing & Installing Steps
Before you start laying boards down, you’ll need to install your railing posts. Once installed, you’ll need to lay down the boards using spacers and screws.
Attach both the bottom and top rails to the rail posts then install the rail caps. Add the balusters at the end for wood railings. Metal rod style balusters in composite rails sit inside the top and bottom rails, you’ll need to install them at the same time.
Deck steps require footers or a concrete pad. You’ll need to create the stringers and install steps and toe kicks if necessary.
For detailed instructions, consult our Decking, Railing and Stairs Guide.
Additional Wooden Deck Construction Considerations
Do you already have a patio, concrete stairs or even a tree you’d like to keep? You don’t need completely clear ground to build your dream deck. Include what’s there for structure and beauty buy consulting our guide on deck construction considerations.
Ready to start your deck project?
Find ProsReturn to Top
DIY vs. Hiring a Pro
Should you build a deck yourself? Obviously, this depends on your carpentry skills and the type of deck you want to build. If you want to build a simple one from a pre-designed plan and you have basic carpentry skills, it’s a plausible DIY project. Don’t take the building lightly, though, or get overconfident. Improperly installed decks can end up costing more than having one installed professionally to begin with.
Follow these simple tips to find a professional to help you’re your new project. Also, take into consideration all the professional vs. DIY deck building considerations before getting started.
Tips & Costs of Making Your Own Deck
A few final tips and things to consider before starting:
- Use a Home Improvement Store. Places like Home Depot and Lowes can help create a plan and put together a list of supplies and equipment you’ll need – all for free.
- Get help. This is a far easier project with two people than one. Call in a favor and get a friend to help for a weekend. It’ll make the job more enjoyable and efficient.
- Budget about $500 for equipment rental. Renting the proper tools is a cost-effective way to make the job go smoothly.
- Wood Maintenance. For wood, plan on about $850 to re-stain every 3 to 5 years.
- Subcontract some of the work. You can subcontract footer installation or other work.
What a Deck-Building Contractor Can Do for You
Here’s where we get into the distinction between whether you can build your own and whether you should build your own. Most decks are a major home improvement project that you’ll want to last for a long time. At the very least, unless you know you’re capable of building a quality product, you should talk to a contractor and get written estimates. Let the contractor know that you’re considering doing the project yourself and/or working within a strict budget. They will likely have cost-saving measures you wouldn’t have thought of.
Ready to start your deck project?
Find ProsReturn to Top
 Understanding Deck Construction
  Cleaning Your Exteriors With a Pressure Washer
  Deck Maintenance Tips
  Should You Build a Deck or Hire a Pro?
  3 Benefits of Under-Deck Stain

“Improperly installed decks can end up costing more than having one installed professionally” I agree with this one. And aside from the cost, you are also loosing the quality of the deck and you are putting yourself in danger or whoever uses your decks. I still recommend pros than DIY.