These days anyone and everyone with a smartphone can be a photographer. Sony even has a mobile phone category for their World Photography Awards. But, like with all art, there are still photography purists out there, using 35mm film to capture moments of simplicity, complexity and, of course, beauty. Many of them take their film to be processed, but there are some who prefer to do the developing themselves. For that, you need a darkroom.
Back to Basics: What is a darkroom?
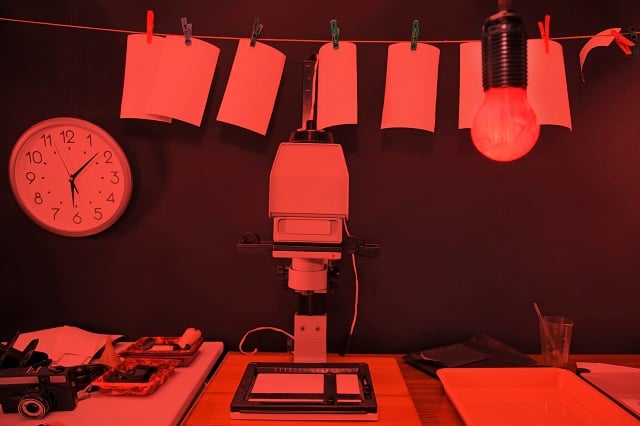
Pictures from non-digital cameras must be developed, and that takes specialized equipment, light-sensitive processes and a darkroom. Darkrooms are special rooms where photographers use different lighting to process images. For example, a darkroom can use red light so that the light-sensitive paper they use to develop photographs does not become overexposed.
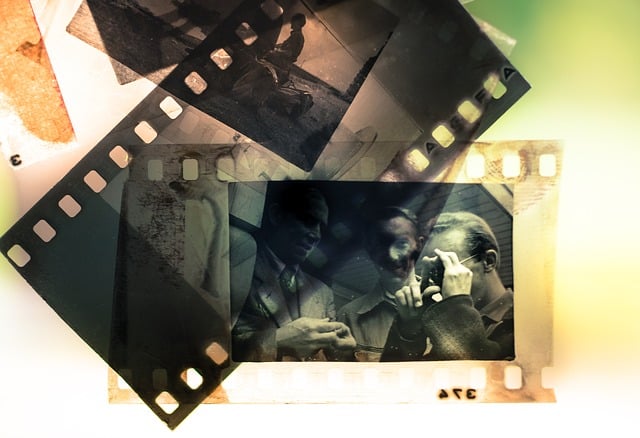
Peering into a darkroom, you will notice a lot of specialized equipment. That’s because developing film requires cutting the film into negatives, which are then projected onto special photographic paper using light and chemicals. That’s an oversimplification of the process, and if you’re investigating how to build your own darkroom, this information is probably nothing you haven’t heard before. You have your camera, your film and your art – now it’s time to get that darkroom.
Darkroom Essentials: What you need to develop quality images
Darkrooms are usually split into two sections – a dry side where the enlarger and the cutter are located and a wet side with the chemicals for paper processing and a sink. You’ll need to be mindful of water temperature and variants, so having a thermometer around is a good idea, though there are water flow temperature controls you can buy. You’ll also need to make your darkroom light-tight, so you can control access to the four kinds of lighting used during the development process:
- No light: film must be handled in total darkness if you want to prevent damage
- White light: regular light lets you see what you’re doing: cutting negatives, mixing chemicals, inspecting finished photos and cleaning up
- Safe lights: specific colored lights can let you handle the photographic paper without damaging it. Though, you must remember, total darkness is ideal, so be sure to review the manufacturer’s specifications when it comes to safe distance and bulb brightness
- Enlarger light: clearly see the photo projection on the enlarging base or paper
In addition to light, you’ll also need good ventilation to filter in clean air and draw out the chemical-filled air. Most darkroom enthusiasts take extra steps to make sure that their ventilation doesn’t let light in.
Think about categorizing equipment as a necessity or as a desirable. Some equipment, like an enlarger, is a must-have. Running water, while convenient and helpful, is optional.
The DIY Darkroom: Setting up Your Space
Because you need a light-tight room, a large closet, basement or any room without a window is a good place to start. If any light comes in, you risk damaging every photo you try to develop. A good test is to close the door and shut off the light. Let your eyes adjust. If any light is coming in, you need to pick a new room or patch the light leak. You can tightly tape cardboard around windows or cover leaks with fabric. Once you find yourself in total darkness, you know you’ve found the best spot for your darkroom.
If you have the space, it makes the developing process easier and smoother to have storage in your darkroom. You’ll want cabinets or cupboards where you can keep your developing materials close by. Since you’ll want to try to divide the room into two, you can put the paper on the dry side and the chemicals in the wet area, usually in a closed space under your developing trays. Consider the many different ways you can store film and other photography equipment.
The dry side and the wet side are helpful for the process of developing film and for staying organized, but if this layout doesn’t work in your only light-tight space, you’ll need to improvise. The idea is to find a space that is comfortable for you to work in and allows you to manipulate your tools and materials with ease and without contamination. You must keep these areas separate to avoid damaging film with chemical or water splashes, but how you do so depends on the space. Keep in mind you might want some space between liquid and electricity.
If your space is limited, think like an architect building skyscrapers downtown. Find out how you can safely stack trays up and down to maximize your space. Before you begin building or remodeling the space, you’ll want to map out the space, drawing up a floor plan that includes dry side, wet side and storage areas. Get a checklist going of your materials, and create a timeline of the building process. The more organized you are and the more thought you put into the planning phase, the more effective and efficient your building process will be.
The Enlarger: The Centerpiece of the Darkroom
You’ll want space to keep your enlarger and lenses as your photography needs grow. This is the most expensive piece of equipment you’ll need, and not all enlargers come with a lens, which can also increase the price.
The enlarger, nestled in the dry area, will need to share space with where paper, loupe, negatives and other “dry” equipment will go. If you’re in a space with counters and cabinets, you’re all set. If not, consider building the counters and shelves with thick plywood, or nabbing cheap, portable table-tops from home goods stores like IKEA.
The Wet Side: Keep Safety First
On the other side of the dry area, you’ll need space for your chemicals and processing materials – the wet area. Developing photographs requires specific chemical solutions: developer, fixer and stop bath. Make sure your trays and tongs are stored carefully and marked clearly. It’s easy in a small space to accidentally place chemicals or tools in the wrong tray, contaminating and ultimately destroying your photos. You’ll also need space for a water tray close by to rinse your developed pictures and a dust-free area to hang your images to dry.
The wet side is filled with chemicals, which is why ventilation and safety are key. Be sure a fan is keeping the fresh air flowing and wear a facemask and gloves whenever handling toxic substances. In addition, you’ll want to set the wet side up with a funnel for safely pouring chemicals, trays of multiple depths and widths, various-sized graduates to measure and mix chemicals at the right consistency, and large bottles for storage.
Manually processing film is a fickle art and science. Every element, from air, to light, to space, can have an impact on your photos, as well as your enjoyment of developing them. When creating a DIY darkroom, you’ll have to make some sacrifices, but try to take into account how variations in these elements could cause completely different results. This can often be rewarding, but sometimes frustrating. Building our own DIY darkroom is a process, but one that, if you are in love with your craft of photography, you’re likely to enjoy more often than not.
How Much Would a Darkroom Cost?
Buying tools and materials to process your own pictures can add up quickly. If you’re lucky, you can find local photographers looking to get rid of old equipment for an inexpensive full set-up. Basic darkroom kits can help you get started with trays and graduates for about $100. Other basic materials like chemicals, paper, film, lights and other accessories will vary in price based on your preferences.
Tip: Avoid damaging your pictures with cellphone light you check the time. Don’t forget to pick up an analog clock, about $10, to help track time during photo development.
Some of the most expensive darkroom equipment will be the enlarger, ventilation systems, lightboxes. New enlargers vary a lot in cost based on quality and features from about $300 to well over $1000. Ventilation cost will depend on the location of your darkroom. Basic vents cost about $60, while more integrated systems that circulate air farther can cost about $400. Lightboxes and their accessories will cost between $50 and $175.
If your room doesn’t already have running water, sink installation costs $400 on average. Additional renovation costs will vary based on the location you’ve selected for your darkroom, and can significantly increase the scale of your project and budget.
Improvised materials you can find around the house, like layered flannel blankets and a roll of heavy-duty tape to block natural light, can help you save money on the overall cost of your home darkroom. Many darkroom tools can be found online, so do some research and find the tools that work best for your space, budget, and photography.
 How to Wire a Light Switch
  Which of these luxury areas would you love to have in your home?
  3 Bathroom Remodels You Can Afford RIGHT NOW
  Think Home Safety with Your Basement Remodel
  Sustainable Home Improvements that Help Save the Planet

Are You Familiar With This Topic? Share Your Experience.