On This Page:
A kitchen island is a great addition to many modern kitchens. In addition to providing much needed counter space, it can also serve as a cooktop and a tidy storage space. For homes with an open floor plan, it can also act as a room divider, increasing visual appeal while adding functionality. A well-designed island is often the focal point of a kitchen and a popular gathering spot for family and friends.
Planning Your Island
Because a kitchen island is accessible from all sides, it is a versatile piece of furniture that can be used in a variety of ways. When planning its design, therefore, you must first consider how you intend to use it.
Functionality
Typically, homeowners use their kitchen islands in one of four ways. They are:
- Food prep area
- Additional cooking area
- Cleanup area
- Informal dining area
Each of these functions comes with its own design considerations. For instance, if it is to function as a food prep area, you might find it useful to include a small sink and a butcher-block countertop. Additionally, you will likely want to position it close to the refrigerator, cooktop, and garbage disposal for the sake of convenience. Some homeowners also choose to add electrical outlets for small kitchen appliances to their islands.
If it will have a cooktop, you will need at least 18 inches of space on either side of the cooktop for the sake of safety. Additionally, you may want to add an overhead vent hood and countertops that are heat-resistant such as stone, tile, or metal.
For areas to be used as a cleanup area, you might consider adding pull-out bins for garbage and compost, as well as extra storage space for dishes and cleaning supplies.
If doubling as an informal dining area, you must ensure that the height of the counter will accommodate chairs or stools comfortably. Also, you might consider choosing a countertop with rounded edges for the comfort of guests.
Size Considerations
Because an island is accessible from all sides, it can take up quite a bit of space in your kitchen. At a minimum, it should be about 4 feet long, at least 2 feet wide, and high enough to allow for comfort when you are working at the countertop or sitting under the counter overhang. If your kitchen will not accommodate these dimensions, it is better to forego it in favor of other options.
Proper Placement of Your Island
The placement is dependent upon how you intend to use it. In general, when planning your design, you will want to ensure that it is placed in such a way that any cabinet doors and storage bins can be easily opened or pulled out. Additionally, if you intend to have a dishwasher in your island, be sure that the door of the dishwasher will be unobstructed when completely opened.
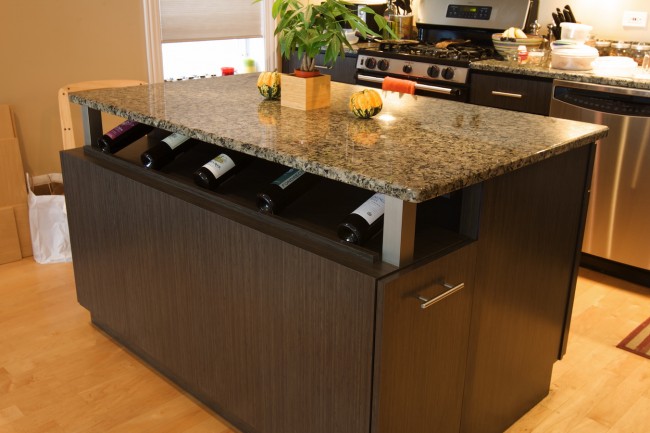
Storage Options and Considerations
Ideally, your kitchen island will provide plenty of additional storage. Depending on how you plan to use it, you may find that your storage options vary. For instance, if it will house a sink, oven, or dishwasher, your storage area will be considerably reduced. On the other hand, if it will be used for dining or clean-up, you can likely use all the cabinet space.
You can maximize your storage space by adding shallow drawers, lazy Susans, and platforms that attach to doors and swing out for ease of access. There are a variety of such organizational items that can increase the functionality of the space. Your local home improvement store can be a great resource for finding these handy storage options.
Lighting and Seating Considerations
Your kitchen island will be less useful than it could be if you do not illuminate it correctly. For almost everything that you would do in this area, adequate lighting is necessary. If your ceilings are of average height, recessed lighting is a good option. It provides enough light without being obtrusive.
If your kitchen has high ceilings, however, recessed lighting will likely not provide enough light. In this case, you might want to consider pendant lighting. Pendant lights should be placed directly over it for the best effect. Here is a word of caution, however. If you choose pendant lighting, you must be careful to place the fixtures to hang at the correct height so that they do not interfere with your view or obstruct the work you do at your island in any way.
The type of seating you use depends upon the counter height. Some homeowners find it useful to have a dual-height island so that one side can be used for seating and the other side can be used for working comfortably at standing level.
Here is the general rule of thumb for seating options:
- For a 28-30 inch counter, regular chairs can be used.
- For a 36 inch counter, a low stool can be used.
- For a 42-48 inch counter, a bar stool can be used.
Cooking and Ventilation
If your kitchen island includes a cooktop, you must take into account providing proper ventilation. This can be an expensive and troublesome aspect for a number of reasons. A downdraft fan behind the cooktop is often the top choice for homeowners because it eliminates the visual problem of having an overhead vent hood. The downside to this is that downdraft fans may not handle the worst cooking smells completely. To compensate for that shortcoming, you may need to install a second exhaust fan in the ceiling.
The other option is to use an overhead hood that extends up through the ceiling. This option has a tremendous visual impact on your kitchen, which may or may not be something you desire. Some homeowners choose to have custom-designed overhead hoods which make a bold visual statement. Because the hood must be completely finished on all sides, costs can mount for this option, making it less attractive to some homeowners. Additionally, because an overhead hood is so prominent in your overall design, it can negatively affect the final look of your kitchen if not done exceptionally well.
How to Build a Kitchen Island
Once you have your design ideas in place, you can begin to build it. For some homeowners, the project can be done in a weekend. For others, it might take a week or two to get it just the way you want it to be.
While instructions will vary if you add features such as sinks, dishwashers, or cooktops, here are some steps for building a basic kitchen island using stock cabinets from a home improvement store. The finished product described here will have a 24 x 60 inch base, with an overhanging countertop that is 39 x 73 inches to accommodate a seating arrangement on one side.
Materials Needed
- 2 unfinished stock cabinets (15 X 30 inches)
- 4 – 1 x 4 pieces of wood for toekick
- 1 sheet fiberboard for back panel
- One 39 x 73 inch countertop
- 40 – 1 5/8” screws
- Paint
Tools Needed
- Cordless drill
- Level
- Measuring tape and pencil
- Painting or staining supplies
- Sanding equipment and supplies
Step-by-Step Guide
1) Assemble the cabinets per manufacturer instructions, leaving off the doors until later in the process.
2) As a separate box, build a toe-kick that measures 21 x 54 inches.
3) Position your built toe-kick into place on your kitchen floor, and attach it securely to the floor with L-brackets.
4) Place the cabinets inside the toe-kick, securing them to the toe-kick and to each other with screws.
5) Sand any rough areas thoroughly.
6) Paint or stain cabinets, toe-kick, and cabinet doors according to your preference.
7) Once the paint or stain has dried thoroughly, set the countertop in place, making sure that you have a 1 ½” overhang on the side of the island where the doors will be. That should leave approximately 15 inches of overhang on the side where you intend to have a seating arrangement.
8) Secure the countertop to the cabinets with screws.
9) Attach painted or stained cabinet doors and install cabinet pulls and hardware.
10) After touching up any areas that need more paint or stain, clean surfaces carefully before use.
These easy steps will provide you with a very basic kitchen island. You can enhance its beauty by adding decorative molding and visually appealing cabinet pulls.
Circumstances that May Call for a Pro
If your kitchen island plans include more advanced options like sinks, cooktops, dishwashers, or garbage disposals, there are DIY tutorials online to walk you through the process.
However, when you choose such advanced options, you may find it easier to work with a professional to ensure that the job is completed correctly. Especially in the case of installing an overhead vent hood, wiring it for additional electrical outlets, or adding additional plumbing for a sink, dishwasher or disposal, a pro can handle the installation with minimal disruption to your schedule and your home.
Conclusion
A standalone island can bring new life to your kitchen. Adding storage space, additional counter space for food prep and clean-up, and a new space for informal dining, it can be a versatile, functional, and beautiful addition to your home.
 DIY Guide to Repairing a Leaky Kitchen Faucet
  DIY Guide: Replacing a Washer Pump
  Building a Pergola: A Guide to Building Your Own or Hiring a Pro
  DIY Guide: How To Service Your Furnace
  How to Hide Pesky Carpet Seams

We’re taking out our peninsula (the L shaped cabinet in our current kitchen shape) and using it as our island. It has the drawers and cabinets there to begin with then we’re going to use quartz as countertop. I thought it was a good idea!