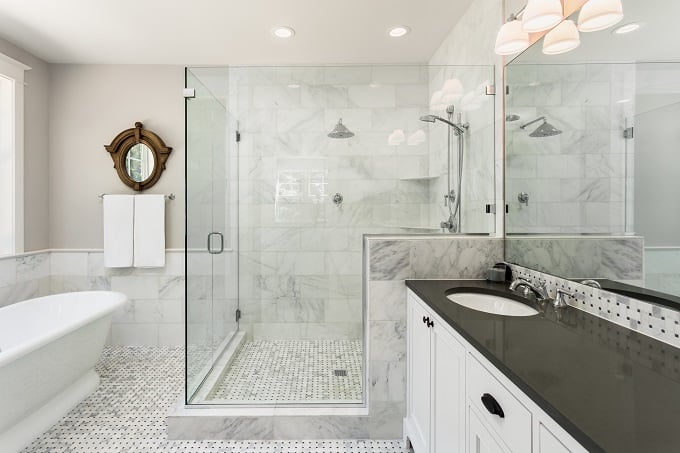
Whether you’re a weekend warrior intent on doing it yourself, or researching your options before hiring a professional, one thing you need to know is this: At the heart of every gorgeously tiled shower is a sturdy shower pan. This custom-built pan provides the necessary base over which to lay tile. While prefabricated pans are faster and easier to install, if you want to use tile instead of an acrylic or fiberglass enclosure, you need this tailor-made option. This is necessary for durability, style, and so the pan is the exact size and shape for your new shower.
This project typically takes at least two to four days, and costs anywhere from $200 to DIY, up to $1,000 or more for professional installation. Building a custom pan provides a handcrafted look. It also gives you the ability to choose any tile pattern, color, or material you want.
On This Page:
Preparing for the Project
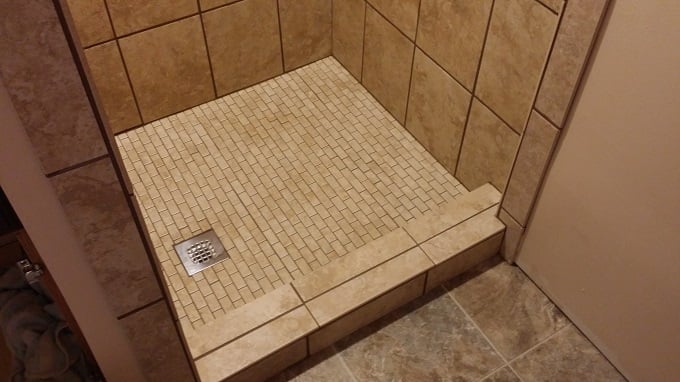
The primary goal of the shower base is to create a sloped floor angled toward the drain so the waste water flows efficiently into the pipes. The base needs to have a drain, an edged frame, and tiles for the decorative finish.
Materials and Tools Needed
Some of the basics required include:
| Materials | Tools |
|---|---|
| Preblended dry mortar (a mix of sand and cement) or ceramic floor mix | Hammer |
| Waterproofing barrier | Wet saw |
| Two 2-inch by 4-inch by 8-foot lumber board | Electric screwdriver |
| Several 1/2-inch by 2-inch by 7-foot boards | Tape measure |
| Thin-set mortar | Protractor |
| Tile | Pencil |
| Tile spacers | Disposable paint brush |
| Bullnose tile/shower curb tile | Notched trowel |
| Grout | Sanding block |
| Caulk | Level |
| 2-inch pipe | Small foam roller |
| Shower drain | Bucket |
| 4-inch screws | Rags |
| 1-inch nails | Mask |
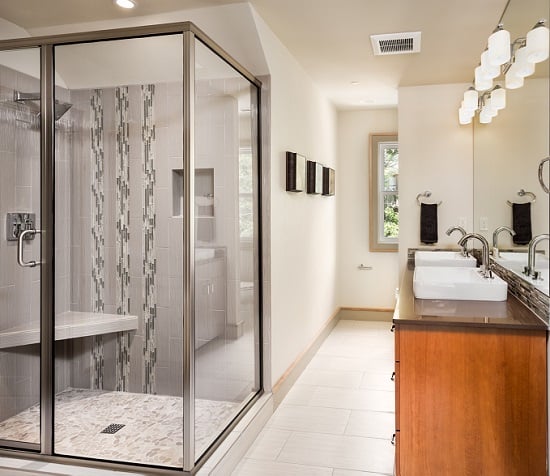
Choosing Your Tile
Picking out the tile is the first step. It also makes it far easier to determine the dimensions of the entire space once you know the size of the tile you’ll be working with.
When you’re choosing your floor tile, there are several important factors to consider. First, remember that the floor is a wet environment. Build it to be as watertight as possible, starting with your tile choice. Look for tile designed for submersion or use in pools. Additionally, look for something with a slip resistance rating of A or B.
Mosaics are popular designs because they work well on the sloped surface, and they feature adequate grout lines to minimize slippage.
| Material | Avg Cost Per Sq Ft |
|---|---|
| Ceramic | $1 – $6 |
| Porcelain | $2 – $8 |
| Natural Stone | $3 – $12 |
| Marble | $10 – $12 |
| Glass | $15 – $20 |
Ready to start your Tile Shower Floor Installation?
Find ProsReturn To Top
Steps for Building & Installation
There are several options for building a custom base. Pre-sloped pans made for using with tile eliminates the need to mud or calculate the proper slope for drainage. Only a few companies make these foam or plastic trays, so they may be difficult to find. The more traditional method involves building a shower pan frame, pouring mud into it and waterproofing the area before adding tile. This project will generally takes a full week to complete, including the time needed to allow the mud to dry. This guide is based on this traditional method.
Building the Frame
Framing out the base can be tricky. Although it’s possible to DIY, if you’re not experienced with this type of work, consult a pro for help with the construction.
- Determine the size and shape of your shower. Use 1-inch by 2-inch boards to represent where the doors and panels will go, taping them down before marking the floor to note the curb, which should be between 3 and 4 inches wide.
- Mark and cut the 2-inch by 4-inch boards to the size of the frame, using the protractor to mark the angles needed for the outer and inner frame.
- Assemble the wooden frame of the base, with inner and outer edges of the curb.
- Remove the taped down 1-inch by 2-inch boards, cut them and nail them to secure the frame in place.
- Drill screws into the bare floor between the inner and outer curb edges every foot or so and at every joint. This will later help join the curb to the floor.
Mixing & Pouring the Pan
- Mix the mud according to manufacturer instructions.
- Pour it into the curb frame until the mud reaches the top of the wood frame, making the top as level as you can.
- Wait 24 hours before removing the frame and scraping the newly set mud smooth with a drywall knife.
- Use a level to make sure the top is level, using a sander as needed to create perfectly level lines.
- The top of the drain should be 2 inches above floor height, and you want to mark the walls and curb to a height 2 3/4 inches above the floor as a guide to the amount of mud you need to maintain a 3/4-inch slope.
- Pour mud into the shower pan, mixing it with a trowel as you go to get rid of air bubbles.
- Use the level to make sure all sides of the pan slope toward the drain.
- Wait three days for the mud to dry and cure before waterproofing it.
- Paint over the entire pan, including corners, nooks and the perimeter with a liquid waterproofing product.
- Allow the first coat to dry, and then apply a second one. No one wants to have to repair bathroom leaks, and this is additional insurance against potential moisture damage later.
Plumbing & Drain Considerations
Most shower drains are designed to use with 2-inch pipes. If you’re converting from a tub or if you’re simply unsure whether to use 1.5-inch or 2-inch pipes, go with the larger option. This allows water to drain faster, minimizing the risk of flooding.
Popular drain types are made from cast iron, PVC or ABS. They have an integrated flange that gets bolted to the pan’s waterproof liner. Even if you choose to do the rest of the project on your own, hiring a pro to work on the plumbing and drain installation can ensure that all the connections are leak-proof.
Ready to start your Tile Shower Floor Installation?
Find ProsReturn To Top
Installing Your Tiles
- Take all your measurements, and do a dry run to lay the tiles out before getting started. Lay the tiles down on a dry surface to see where you need to make cuts and how everything fits together.
- Cut the tiles and dry fit them again to ensure a snug fit.
- Right before you’re ready, wipe the concrete shower pan with a damp sponge to remove any remaining dust, which could prevent the thinset from adhering.
- Smooth thinset on the concrete to create a 1/8-inch thick layer. Use the notched edge drag a second, thinner layer on before smoothing it lightly with the flat edge. Place the tiles, let them sit for a few minutes and lightly wipe the thinset away from the joints.
- Use a tile nipper to shape the tiles around the drain.
- Mix the grout, apply it with a rubber float, let it dry for a few minutes before wiping the grout off the tiles’ surface.
Ready to start your Tile Shower Floor Installation?
Find ProsReturn To Top
Waterproofing, Caulking & Sealing
Once the tiles are set and the grout has dried according to manufacturer recommendations, caulk around the drain’s circumference and create a watertight seal. Additionally, you’ll need to caulk around corners and anywhere the tile meets another surface. For example, where the floor meets the curb and where the floor meets the walls.
Wait until the caulk dries before adding grout sealant. At this point, your shower base should be perfectly waterproofed and ready to use.
Removal & Replacement
If you’re refinishing an existing shower or switching from a tub to a shower, you’ll need to remove the existing structure before getting started. To do so:
- Remove the drain cover and place a clean towel or rag into the drain before chiseling along the grout line of the center tiles.
- Use a 3-pound sledgehammer to hammer the tile until it’s dislodged. Continue chiseling down to the waterproofing membrane.
- Slip a flatbar into that hole and under the mortar bed before prying upward to destroy the entire floor.
- Remove the debris and sweep the area before moving on to installing the base.
Ready to start your Tile Shower Floor Installation?
Find ProsReturn To Top
DIY Considerations
For the DIY minded, there are a few tips and tricks to make things go smoother. For example:
- Plan, plan, plan! Take all the time you need in the beginning stages of the project for fewer surprises and headaches later.
- Gear up for comfort: Get a set of knee pads to make working on the floor more comfortable and a mask to avoid inhaling concrete dust.
- Measure and cut: Measure and mark tiles before cutting them. Use a carborundum stone to smooth sharp edges.
- There’s an order to everything: In most cases, tile work goes as follows – ceilings before walls and walls before floors.
Although this is a doable DIY project, it can be overwhelming, particularly if you don’t have a lot of experience or the proper equipment. If it all becomes too much, connect with a local professional to get some help in completing the work.
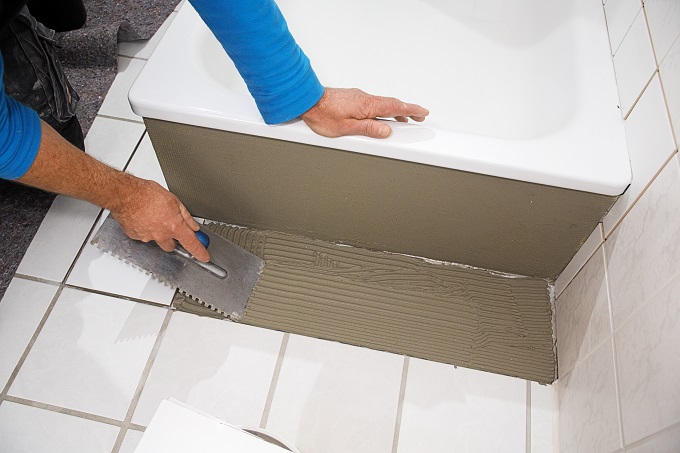
 How to Install a Fiberglass or Acrylic Shower Pan
  Bathroom Shower Remodeling Tips
  3 Bathroom Remodels You Can Afford RIGHT NOW
  Corner Bathroom and Kitchen Sinks
  Customize Your Toilet with a Bidet Faucet

Wow!! Out of all the tile projects that can come up, a shower should be left to the professional and I mean one that specializes in showers. There are tile installers who have been installing tile for years that have no idea of how to build a shower that does not leak. The job can look beautiful after the install but the experience of the installer is put to the test after months if not weeks of use. If there is a seat or window in the shower it is even more important that one has experience doing these. I have been installing for almost 40 years, the more experience the more understanding you have as to how and where water will find its way out and invite termites or more often than that, water damage that can be extensive.
Keep in mind that, according to the building code, any wood which will be in contact with concrete or masonry, must be pressure treated or be of a species which is naturally resistant to wood destroying organisms. Cement board, such as Hardi board or Wonderboard is included in this requirement.
It is not necessary to build up a 2 3/4 mud bed. There are products available which will allow you to build up the outer edges by the 3/4″ mentioned and a feather edge at the drain. Ardex, Laticrete and others make such a product. This allows the tile in a shower to be minimally higher than the surrounding floor and still meet ADA requirements for no more than a 1/2″ step.
Look into the use of products like Redgard for waterproofing the enclosure. With the use of these products with the tape or mesh, cracks which may occur at corners or floor to wall intersections, can be eliminated. Manufacturers recommendations are for two coats. It can be applied with a roller or brush. Tile can then be installed directly over it using a modified polymer thinset.