Reviewed by Bob Tschudi,
Home Building and Remodeling Expert.
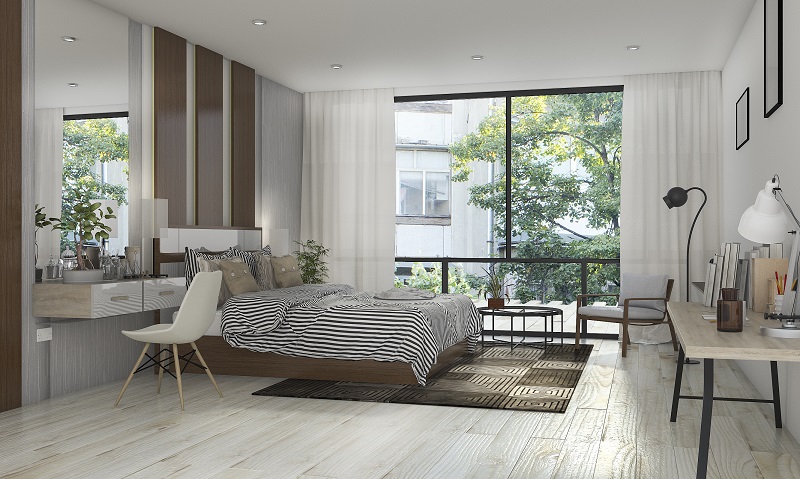
Laminate is a popular synthetic flooring and a common choice for homeowners. This guide explains everything you need to know about how to install the material on any surface, information to look for when hiring a professional, and how to DIY the project. Homeowners are also instructed on the preparation steps required before beginning.
On this Page
- Tools Needed
- Measuring
- Purchasing Laminate
- Removing Flooring
- Prepping the Subfloor
- Underlayment, Vapor and Sound Barrier
- Cutting
- Installing
- Around the Door
- On Stairs
- FAQs
- DIY or Hire a Pro?
Step 1: Gather Tools Needed
Laminate flooring requires many tools and materials for installation. A lot of the items are cheap and can be purchased at most hardware stores. Here are some of the average prices:
- Underlayment: $3-$5 per sq. ft.
- Barrier Sheeting: $50-$60 for 1,000 sq. ft.
- Laminate Glue: $8-$13 per bottle
- Polyethylene Tape: $10-$15 per 50–yard roll
- Tapping Block: $8-$10
You will also need tools such as goggles, a tape measure, drills, and a table or circular saw. If you do not have experience using electric saws, do not attempt to use them on your own for your safety. Many professionals supply their own tools and can cut the boards for you if you would like to complete the rest of the project on your own.
Step 2: Measuring Your Rooms/Space
Laminate flooring is often sold by the square foot. You will need to determine the size of the area for your project, which can be done by:
- Measuring the length of the perpendicular walls of each room where the material will be used. One of the easiest ways to measure the lengths of your walls is using a standard tape measure, which will be the most accurate method.
- Then multiple those two numbers together to get the total square footage of the room.
- Repeat this process for every room, hallway, and area where you would like to install the flooring and then add all of them together.
An example of this process can be seen here:
| Room | Dimensions in Feet | Total Square Footage |
|---|---|---|
| Living Room | 10×12 | 120 |
| Hallway | 3×4 | 12 |
| Kitchen | 8×10 | 80 |
| Total Area | 212 |
212 square feet is the total amount of material that you will need to fill the area of your project.
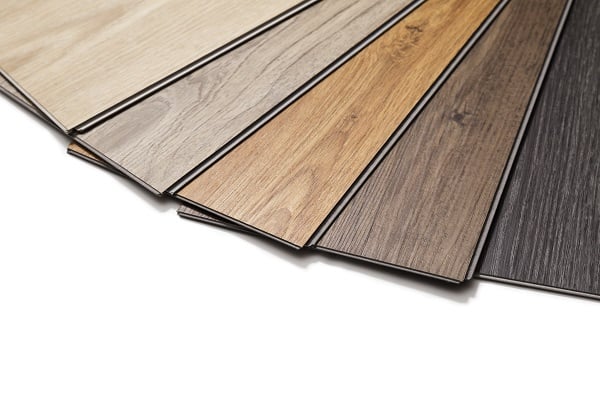
Step 3: Purchasing the Laminate Wood
Stores sell many different types of laminate wood to suit every home. Some of the most popular choices currently available include pine, maple, cherry, and oak. The finish can also be glossy, embossed, or high-glossed. “There are so many choices of laminate flooring that just about every designer choice can be accommodated,” says Bob Tschudi, a Raleigh, NC-based GC. “If the homeowner has pets or heavy traffic (many family members) we usually recommend that they go as thick as possible.”
Installation Method
Laminate wood also features different installation methods. Some samples are called “snap-together” types. This features planks and tiles that do not use any adhesive, nails, or other fixing mechanisms. Other common sorts will require the use of an industrial grade adhesive or wood glue to keep the material in place. A professional can help you determine which works the best in your home.
- Planks: Look like real wood and can be installed one by one. A benefit of this type is that you can customize the pattern.
- Tiles: Can be easier for homeowners to install because they line up with one another and can be placed one by one in solid rows and columns. Because of their size and shape, they are more difficult to customize than planks. Think of them as squares with a pattern already developed. Trying to change it is more difficult than creating the pattern on your own.
Thickness
When determining the thickness of the laminate you need, it is helpful to ask a professional. Typical flooring options range between six and twelve millimeters and change the overall feel of the material underneath your feet. A thicker type feels like hardwood flooring and will be stronger and more durable over time, but thinner material is cheaper. Thicker varieties are additionally easier to install and have greater impact resistance.
However, thicker flooring might not work in your home, which is when a professional opinion is needed. Aside from thickness, the other variations in material are simply cosmetic with a few practical pros and cons.
You should remember that all laminate, regardless of its thickness and appearance, needs to be set out in the area where it will be installed for at least two to three days. This acclimation is necessary because the material is porous and will expand or shrink based on the environment’s humidity. You want your flooring to adjust to the temperature and humidity of the room, so the laminate’s size doesn’t change during construction.
Ready to start your Laminate Floor Installation?
Find ProsReturn to Top
Step 4: Removing Old Flooring
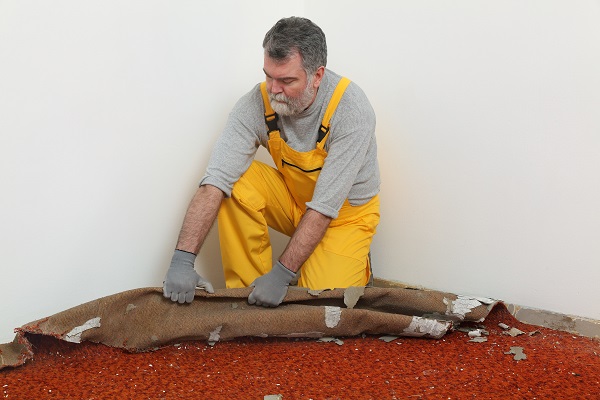
Carpet
- Wear gloves and a dust mask to ensure you don’t breathe in any hazardous materials or cut your fingers.
- Cut the carpet into long strips using a sharp blade.
- Use pliers to pull up the carpet from the four corners of the room, and detach it from anything holding it in place near the walls, like adhesives.
- Roll the carpet as you remove each of the four strips.
- Vacuum the area underneath the old carpet, and your job is complete.
Vinyl
- Wear gloves and a dust mask.
- Locate a section of floor without glue underneath.
- Cut the vinyl in strips and start to peel it up. Use a scraping tool to loosen sections which are strongly attached to the material underneath.
- Mix together soap and water and let it soak into any glue that remains attached to the floor after you remove the vinyl.
- Scrape the leftover adhesive away.
- Vacuum the area once the materials are removed, and your job is done.
Note: If soap and water doesn’t work, use a heating tool to soften the adhesive, and then scrape it away.
Wood Boards
Removing hardwood the wrong way can cause permanent damage to the subfloor. If you’re not comfortable with this procedure, contacting an experienced professional is recommended.
- Put on gloves, a dust mask, and goggles for safety.
- Choose an area to begin with and saw the boards into small sections using an electric saw.
- Use a pry bar to lift the sections of board you have cut and be sure to pry them in the same direction they are nailed down. For example, if nails were applied straight down, then pull the board straight up.
- Once the wood is removed, pick up any leftover nails or staples. Using a magnet during this process can help.
- Vacuum the area once the materials are gone, and you’re finished.
Once you have removed the old flooring, you can begin to prepare the room. Remember that any laminate flooring you want to use should already be purchased and laid out in the area for two to three days to become acclimatized to the new environment.
Step 5: Preparing the Subfloor
Laying over Concrete
- Make sure the concrete has a moisture level of 4.5% or lower.
- Fill any low patches in the concrete with a floor patch compound.
- Lay down the sheet of plastic which serves as a moisture barrier.
Laying over Tile
- Fill in any cracks in the tile with epoxy to create a smooth surface.
- Fill in the grout so it is the same height as the tile.
- Clean the tile.

Step 6: Installing Underlayment, Vapor Barrier & Sound Barrier
Once the subfloor is ready, you can place the underlayment, vapor barrier, and sound barrier. These three items are usually stacked on top of one another to protect the subfloor and reduce noise.
Underlayment
Underlayment usually refers to a plastic sheet that is applied before any other material. To use it, follow these simple instructions.
- Clean the area before application.
- Unfurl the underlayment and place it on the ground.
- Cut away any excess material and make sure the entire floor is covered.
Vapor Barriers
Vapor barriers also require an easy process and come in three main types. The first is a sheet which can be purchased at any hardware store.
- Clean the area.
- Unroll the sheet across the desired area.
- Cut away any excess material.
Another option is to purchase a liquid barrier that you can paint on the subfloor and leave to dry. Finally, you can spray the exterior cavities with foam and wait for it to even out. Both options require the same process:
- Clean the area.
- Wear a dust mask and goggles.
- Follow the instructions on the bottle and carefully spray the subfloor.
- Leave the product to dry.
Sound Barriers
In many cases, a sound barrier is just another form of underlayment. A sound barrier refers to a piece of foam or soft material that goes on top of the subfloor and can help reduce the noise made by walking.
- Clean the area.
- Lay down the foam barrier and leave it alone.
Ready to start your Laminate Floor Installation?
Find ProsReturn to Top
Step 8: Cutting the Board
The main challenge in cutting your laminate is to mark the wood correctly. Using a marking pencil, outline precisely where the cuts need to be made, and double-check your measurements before starting. There are a couple of different ways to cut laminate, so choose one which works for you.
Step 9: Installation
#1. Starting the First Row
The first row should be laid near the wall, but not touching it because many walls are not perfectly straight and you want to be able to trim the boards to meet the wall and maintain your pattern. There are few additional considerations for how to start the first row. Remember that you want to start developing your floor pattern, so it helps to determine beforehand what you want each row to look like.
Many construction professionals recommend that the boards be laid perpendicular to the joists of the floor. For the first row, you should also place the boards in the direction you want the pattern to face.
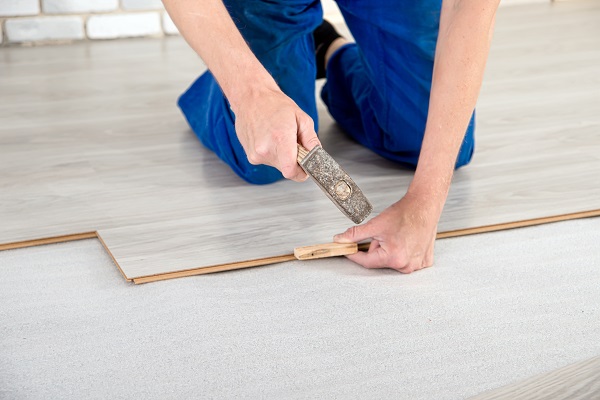
#2. Clicking Down the Laminate
If you are using snap and lock laminate, then the boards will click into place. To make sure they stay, gently tap the board with a hammer and a tapping tool into the adjoining board.
#3. Gluing Boards
Most contemporary laminate does not require the use of glue. If you do use glue, make sure to use one that is PVA Type II. Simply apply the glue to the underside of the board and lay it where you would like. All extra glue should be wiped up or scraped away to prevent messes.
#4. Reinstalling Baseboards
Once you have removed the baseboards, all you need to do is size them and nail them back into place. Caulk and fill any extra holes and repaint them if you would like.
Ready to start your Laminate Floor Installation?
Find ProsReturn to Top
Laying Laminate Boards Around a Door
The main consideration when installing laminate around a door is whether or not there is room under the door jamb for the new floor. If not, mark and cut off a section of the door that is tall enough for the material.
Next, label and trim the pieces that need to go around the frame. These can be applied like the other sections of the floor, so you just need to be careful about your measurements. Laying down the new material will complete the job.
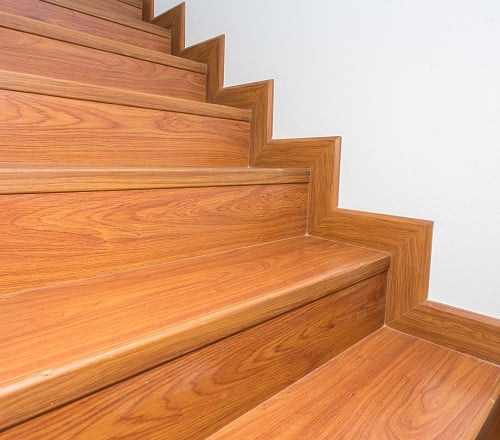
Laying on Steps
There is some extra work involved in placing laminate on stairs.
- Determine whether one plank is enough to cover the stair. If not, it’s better to cut two rather than use a whole one and part of another.
- Cut separate pieces to form the main tread, the “nose” or front of the stair, and the sides near the wall.
- The pieces might need to be glued because you will probably have to cut the snapping laminate.
- Once everything is in place, wipe or scrape away the extra glue, and your job is complete.
Ready to start your Laminate Floor Installation?
Find ProsReturn to Top
FAQs
How long does it take to install laminate flooring?
Installation in a typical 10-by-20-foot room is four to five days with an extra day added for each additional room. Laminate flooring needs at least two to three days to acclimate to the environment of a room to prevent problems like particle board expansion. The actual process of installation (excluding all preparation steps) would take most DIY homeowners three to four hours, with an extra one to two hours to wrap the flooring around cabinets and doorways.
Which direction do I lay the laminate flooring?
Believe it or not, there is a “correct” way to lay laminate flooring. The material should run perpendicular to the joists supporting the floor for maximum structural support. However, many installers warn that you should also pay attention to the direction of the pattern on the material in conjunction with the entryways. The floor tends to flow more when the pattern runs straight away from an entryway like the boards in a bowling alley.
Where do I start laying the planks?
The first planks should be laid a few inches away from the base of a wall, and homeowners should complete one row before adding additional material. They need this gap because the wall might not be even. Having uneven lines can ruin the symmetry and give the laminate a crooked appearance.
Do I need to glue floating laminate?
No. This material was designed to be installed without adhesive, and adding glue can warp the boards.
Is it hard to install laminate yourself?
Installing a laminate floor requires you to calculate your room space and cut boards precisely. The process isn’t difficult for many DIY homeowners, but it is easy to mess up if you get a calculation wrong. If you have a difficult time determining your spatial needs—such as how far of an initial gap to leave when beginning the first row, measuring, or cutting the laminate—then it can be hard to do this project on your own.
DIY vs. Hiring a Pro
Many people find that installation can be relatively simple. This is useful because it helps homeowners like yourself save money, but it does mean that you will need to perform a lot of tedious, hard labor.
The average cost to install laminate flooring by a pro is about $2,800, while most projects range in cost from $1,500 to $4,500. A DIY project costs between $2 and $8 per square foot, which means a 500-square-foot area will be between $1,000 and $4,000.
If you have no experience but would still like to save money, consider hiring a professional for certain sections. The most difficult tasks are applying the material to stairs and cutting the boards accurately.
 Prefinished versus Unfinished Wood Flooring – Pros & Cons
  How to Remove Pet Odor From Your Carpets
  Radiant Floor Heating – How it Works & Benefits
  Is It Possible to Level a Bathroom Floor?
 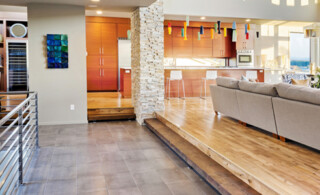 Find the Perfect Flooring: The Pros, Cons and Costs of Top Flooring Materials

Are You Familiar With This Topic? Share Your Experience.