
Laminate flooring has long had a reputation of being one of the more installation friendly flooring materials on the market. Now with new snap together laminate flooring, there isn’t even a close second. Also known as click together flooring and click flooring, snap together flooring eliminates your need for adhesives, nails, or screws of any kind. All you need to do is apply a little pressure to the planks in order to join them together, and you’re well on your way to enjoying a new and beautiful laminate floor in a fraction of the time it takes to install more traditional flooring options.
Laminate Snap Together Flooring vs. Traditional Flooring
The most obvious benefit of click together flooring is the ease of installation, but that’s not the only reason homeowners choose laminate click flooring for their homes. The truth is that laminate has other advantages as well. It’s one of the most cost-effective residential flooring products you can buy, and it’s one of the toughest flooring materials you’ll ever find. These floors won’t stain, scuff, scratch, or ever need refinishing, even when subjected to normal day-to-day use. In fact, if you’ve got kids and/or pets, this flooring product should be #1 on your list.
Snap Together Flooring Styles
Another advantage of laminate click flooring is the wide range of choices you’ll have when it comes to choosing your finish. Because the decorative surface of laminate flooring is actually a photographic image that is pressed onto the planks before being sealed beneath a laminate surface, you can purchase laminate flooring that mimics just about any other smooth faced flooring material. Oak, maple, bamboo, and even stone tile laminate floors are now available for purchase.
Ready to start your laminate floor?
Find ProsSnap Together Flooring Installation
Snap together flooring is really one of the simplest flooring products to install, period. Before you get started, however, be sure to read installation instructions carefully so you know what you’re doing. Also, don’t feel bad about calling in a professional to do the job for you, if you think you’re getting in over your head. Remember, easier installation isn’t just beneficial for do-it-yourselfers. It also means faster installation times and decreased labor costs for those who prefer to hire the job out. Most homeowners spend between 1,400 and $4,100 when hiring a professional for installation, according to our laminate floor cost calculator. If you are thinking about doing it yourself, however, here’s a quick checklist to review so you know what you’re getting yourself into.
- Remove The Old Flooring—The big exception here is older vinyl flooring such as linoleum or vinyl tiles. Your new click together flooring should install fine over the top of those materials, and since older vinyl products often contain asbestos, it’s better to leave them be.
- Level The Surface—Your floor should be relatively flat (within 1/8″) to ensure the laminate will hold together properly over time. If it’s not, sand down the high points and fill in the low ones to make sure you’re working with a level surface.
- Apply Underlayment—Since laminate flooring is a floating floor product, you’ll need to put down a special padding called underlayment before you install the laminate itself.
- Cut Flooring Planks—You’ll need to cut end planks appropriately (be sure to leave room for expansion at the walls), and you’ll need to rip the boards on each edge of your floor to makes sure that none of the boards you install are less than 2″ in width.
- Snap Together Your Floor—Once you get your first row down and shimmed at least a 1/4″ from the wall, all you have to do is line up the tongue and groove together on each board and snap them into place!Don’t forget that planning ahead is the key to a successful click together flooring installation. If you prepare ahead of time (i.e. measure and cut boards before work begins) and invite a few unsuspecting friends over for pizza, you should have your new floor installed in a long weekend or less. Hire a pro, however, and you’re looking at a day or two for installation at the most, depending on the size of your project.
 Benefits of Pressure-Treated Wood
 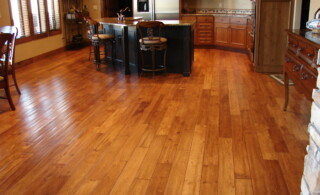 Cypress and Hickory Wood Flooring
  How to Hide Pesky Carpet Seams
 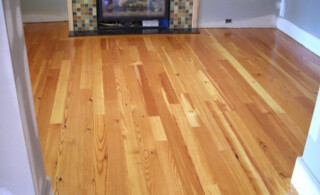 Divine Pine Flooring
 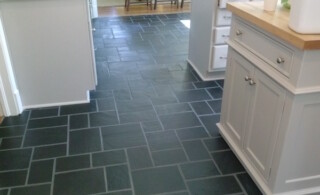 Slate Floors Make for a Great Decor

Are You Familiar With This Topic? Share Your Experience.