On This Page:
Grout fills the crevices between tiles. If yours is cracked or moldy, it’s time for a repair. Use this guide to help you install new, room-freshening grout.
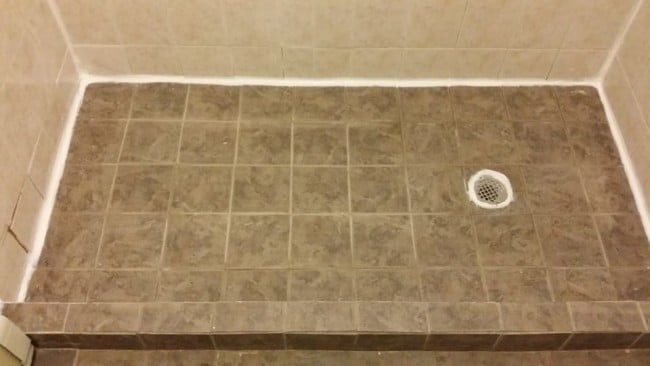
What Are You Re-Grouting?
One of the most common locations for new grout is the shower. Shower tiles are subject to constant moisture and suffer the most from aging. Floor tiles are also commonly re-grouted because of their constant use.
What You’ll Need
- Grout – $13 to $15 per container. There are two types of grout: sanded and unsanded. Sanded grout fills spaces of one-eighth inch or more. Unsanded grout is more compact and used for spaces less than one-eighth inch. One 25-pound bag of sanded grout will cover about 100 square feet, while it will take two 10-pound boxes of unsanded grout to cover the same area.
- Grout Removal Tool – $4 to $30. The lower cost is for a manual saw, while the higher-priced option is for power tools or attachments for power tools.
- Grout Sealer – (about $7). Check the container for the coverage area. Sealant helps waterproof your grout.
- 5-Gallon Bucket – $3 to $5.
- Smaller Bucket – $1 to 2. Fill this bucket with a rinsing solution: two cups of water, two cups of vinegar.
- Chisel and Hammer – about $14 total. A chisel and hammer will help you remove leftover grout.
- Grout Float – $5 to $7. The grout float is a trowel that spreads grout evenly.
- Large Sponge – $5.
- Bathtub Caulk – $4.
- Rubber Gloves – $2.
- Eye Protection – $3.
- Dust Mask – $6
- Shop Vacuum — $130
Steps
- Remove the old grout. Remember to wear face protection. Use your removal tool to pull out the grout between tiles.
- Use a hammer and chisel to gently chisel away any leftover grout. Be careful not to damage the existing tile.
- Use a shop vacuum to remove dust and debris. Mix two cups of water and vinegar in a small bucket and wipe the area down with a sponge.
- Mix grout in a 5-gallon bucket. A smooth, lump-free consistency is ideal. If you use a powered mixer, stay below 150 rpm or you will develop bubbles. Follow the manufacturer’s instructions, but only add three-quarters of the total water called for. Slowly add the rest of the water until you achieve the desired consistency. Let the mixture sit for five to 10 minutes in order for the chemical reactions to take place. If the grout stiffens, stir the mixture until it becomes loose.
- Spread the grout with the grout float. Pour between a quart and a half-gallon of grout onto the floor or smear a sizable amount onto the wall using the grout float. Holding the float at a 45-degree angle, spread the grout evenly in a sweeping arc. Work in a three-foot area at a time. To remove any excess grout from the tiles, hold the float at a 90-degree angle and drag it across in a diagonal path.
- Shape the grout. Shape the grout by running the rounded edge of the float along the joints.
- Let the grout harden slightly. Clear away any excess material when the grout is firm enough to resist denting.
- Clean the excess grout. Dampen your sponge and clean the excess grout by wiping the sponge in an upward direction (or in a straight line for floors). Be sure to use the clean edge of the sponge for each pass.
- Remove caulk from the corners and replace it with bathtub caulking. Because corner joints flex, bathtub caulk is more suitable due to its flexibility
- Buff the tiles with a soft, dry towel and apply a sealant. This will remove any remaining film. Be sure the grout has dried per the manufacturer’s instructions before sealing. You may have to wait three to four hours before buffing and an additional 24 to 72 hours before sealing.
What to Look Out For
- Don’t mix all of the grout at once. Grout will harden as it sits. Only mix half of the grout at a time, or enough to cover a 10-foot area.
- Keep the grout even. Avoid “peaks and valleys” by making sure you get plenty of grout in the joints. Don’t be afraid to pack it in — grout shrinks as it dries. Also, remember to wipe the joints down with a sponge. A wet sponge will help spread the grout smoothly.
- Mix the grout properly. Each kind of grout has its own set of mixing instructions: Follow them to the letter. Too thin of a mixture and the grout will be runny. Too thick and it will resist packing into joints properly. If you’re using colored grout, mix it until the color is evenly dispersed throughout.
- Let it slake. Many people let grout sit for five to 10 minutes before spreading it. This is a critical step because it allows the moisture to permeate it.
- Be patient. Grouting is a big job, but rushing ahead will only lead to more work later. Working in a large area to finish quickly only allows the farther-out grout to dry before you can shape it and remove any excess material. It also leads to uneven grouting.
- Make the sponge damp, not wet. Only clean excess grout with a damp sponge. If it’s too wet, water will run down the wall or keep the grout from drying properly.
- Allow grout 24 to 72 hours to dry before use. Many people use their tiled surfaces a few hours after a re-grout. Premature use puts undue pressure on joints and can cause the grout to weaken.
 Tile Glossary
  Subway Tile Calculator
  Fix-It 101: The Fix-It Literacy Guide
  Green Building Glossary
  How to Build a Custom Tiled Shower Pan

Are You Familiar With This Topic? Share Your Experience.