
Whether it’s time to give your entire bathroom a much-deserved renovation or you simply want to replace an out-of-style part, shower doors are one of the most important finishing touches to any bathroom oasis.
Note: While there are several types of glass doors (frameless, steam, etc.), this article focuses specifically on traditional framed shower doors.
On This Page:
- Steps to Install a Glass Door
- Installation Tips
- Replacement
- Considerations When Adding Top Brand
- DIY vs. Hiring a Pro
How to Install a Glass Door
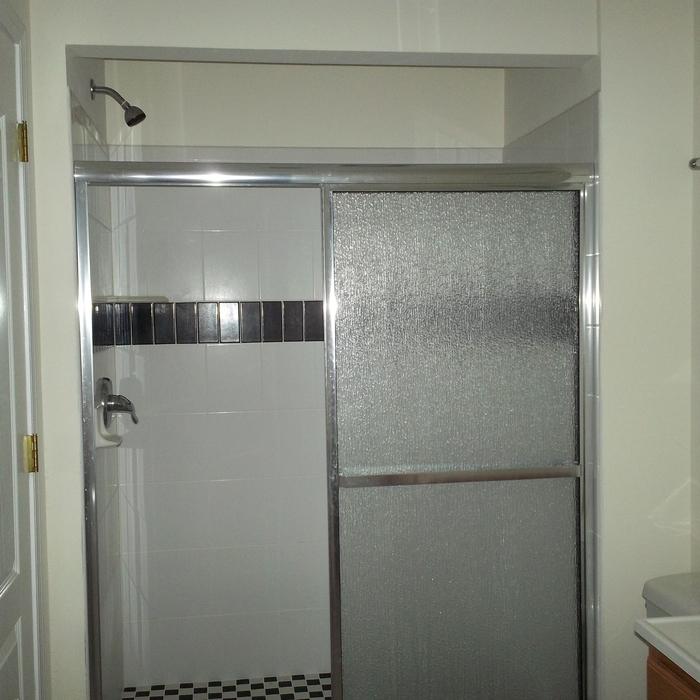
There are two common types of glass shower doors.
Sliding, or bypass, consist of two sliding panels that move by rolling on tracks. Their versatility works well with all sizes of bathrooms as well as with stand-alone stalls or shower/bathtub combos.
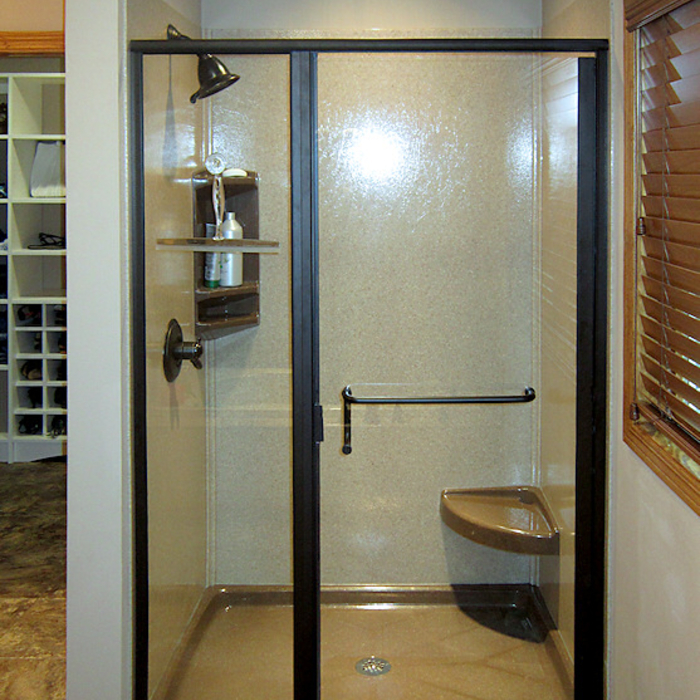
Hinged, on the other hand, move by pivoting on hinges attached to a glass panel or surround. These are most commonly found on stand-alone stalls and require clearance for the door to open into the bathroom.
Regardless of which type you’ll be working with, it’s important to exercise caution. Installation and replacement of shower doors—especially glass ones—can be tricky. Before venturing into DIY territory, make sure you have the necessary safety materials. Always hire a professional for jobs outside of your skillset.
Steps to Install a Sliding Door
- Time: ½ Day
- Cost: $500 – $1,400, though the price can vary based on materials, hired professional rate, and size.
- Tools:
- Automatic center punch
- Caulk (silicone-based recommended)
- Combination square
- Drill and bits
- File or sandpaper
- Hacksaw
- Level
- Masking tape
- Pencil
- Screwdriver
- Rubber mallet
- Tape measure
- Cut the Base Track
Measure it to meet the specification of the shower’s threshold. Cut the track with a hacksaw and use a file to smooth the newly roughened edge. - Place the Track
Set it on the threshold—the fit should be snug—and use a tape measure to check that it is centered (see Tips for Measuring below). - Install the Second Jamb
Slide the strike rail onto the second jamb and hold the rail together as you line up the door with the track. Mark the positions of the screw holes and use an automatic pump to create divots. Drill 3/16-inch holes, tap plastic wall anchors in, and attached the jamb with screws, sliding the door into place. - Secure the Frame
Drill a ½-inch hole through the meeting point of the track and the vertical frame; use a screw to secure the two. - Attach the Top Track
Follow the same steps used to attach the bottom track. Set and secure the top one. - Put the Rollers in Place
Some rollers come separate from the tracks and some come already attached. Regardless, it is worth noting that rollers for the inside door face inside the shower enclosure; rollers on the outside one face outward. - Hang the Doors
Hang the inside one first and slide it all the way toward the wall with the showerhead. Hang the outer one and make sure both glide freely. - Apply Caulking
Seal your work with caulk around the inside and outside of the base track and jambs; smooth the caulking with a putty knife. - Finish with the Handles
Attach the handles to complete your installation. Sliding doors tend to have long, horizontal handles. Your kit should include the necessary materials.
Ready to start your Shower Door Installation?
Find ProsReturn To Top
Steps to Install a Hinged Door
- Time: ½ Day
- Cost: $500 – $1,400, though the price can vary based on materials, hired professional rate, and size.
- Tools:
- ½-inch pan-head-screws
- 1 ½-inch pan-head-screws
- Automatic center punch
- Caulk (silicone-based is best for bathrooms)
- Drill and bits
- File or sandpaper
- Hacksaw
- Pencil
- Plastic wall mounts
- Putty knife
- Rubber Mallet
- Screwdriver
- Tape measure
- Cut the Base Track
Measure the base track to meet the specification of the shower’s threshold. Cut it with a hacksaw and use a file to smooth the newly roughened edge. - Place the Track
Set the track on the threshold—the fit should be snug—and use a tape measure to check that it is centered (see Tips for Measuring below). - Position the Doorjamb
Place it in the base track and against the shower opening and mark the position for the screw holes. An automatic punch can be used to create divots for the screws. - Drill Holes
Use a 3/16-inch drill bit to drill holes where you made the divots. - Mount the Jamb
Tap plastic wall anchors into the drill holes with a rubber mallet; align and position the jamb using a 1 ½-inch-pan-head screw for each hole. - Hang the Door
Make sure the hinge rail is positioned out as you slip it into the jamb. As a partner holds the door in place, use a 7/32-inch drill bit to drill four holes through the hinge rail and mounted jamb. Use ½-in-pan-head screws to hang it. - Install the Second Jamb
Slide the strike rail onto the second one and hold the rail together with it as you line up the door with the track. Mark the positions of the screw holes and use an automatic pump to create divots. Drill 3/16-inch holes, tap plastic wall anchors in, and attach the jamb with screws, sliding the door into place. - Secure the Frame
Drill a ½-inch hole through the meeting point of the track and the vertical frame; use a screw to secure the two. - Attach the Drip Rail
Cut the drip rail to specification and file the edge smooth. Use pliers to crimp the ends together and position the vinyl sweep down. Drill 7/32-inch holes along the frame—make sure not to hit the glass—as you hold the drip rail against the door. ½-inch screws can be used to attach it to the floor. - Apply Caulking
Seal your work with caulk around the inside and outside of the base track and jambs; smooth the caulking with a putty knife. - Finish with the Handles
Attach the handles. Your kit should include the necessary materials for installing a pull handle.
Ready to start your Shower Door Installation?
Find ProsReturn to Top
Installation Tips
Measuring
The base track will need to be measured properly. First, it will need to be cut to fit the shower:
- Measure the threshold.
- Measure the base to specification.
- Use a hacksaw to cut the base to the appropriate size.
- Use a file to smooth the end of the track.
After installation, measure to ensure it’s centered. Use a tape measure and select three or four spots to measure from the track to the back of the shower. Make sure the measurements are the same. If they are not, adjust accordingly until it is centered.
Installing on Tile vs. Prefab
The steps for installing a door are the same for both prefab and tiled. When installing on tile, however, there are a few extra tips needed to keep the tile intact. Standard drill bits typically aren’t appropriate for tile. Consider using Carbide-tipped masonry bits or Diamond-tipped bits. You should also make sure to scratch an X into the spot for the drill bit so it can get a better bite; bits tend to slide around on tile’s smooth surface.
If you’re concerned about cracking tiles or breaking prefab, don’t hesitate to hire a professional.
Sliding Doors on Bathtub Showers
Sliding panels are often better suited to bathtub/shower combinations than hinged. A door offers more privacy and retains heat better than a curtain. Installing or replacing on a combo follows the same steps as detailed above with only one exception: the threshold will be higher than that of a standalone stall. Because of the tub’s presence, there is naturally a higher barrier to entry for a combo. A standard bathtub can be anywhere from 14”-25” in height.
Ready to start your Shower Door Installation?
Find ProsReturn To Top
Glass Door Replacement
A broken part or a change of taste can prompt you to replace your current door. This section discusses replacement parts and considerations.
Removing the Glass Door
The first step to any replacement is to get rid of the original piece. Shower doors are heavy and fragile, though, so it’s recommended to complete this with a trusted partner or hired professional.
- Remove the door.
- Sliding doors can be taken off the track by tilting it up and out.
- Hinged doors can be removed by using a screwdriver to remove the hinges from the door.
- Remove the panels (framing) on the sides of the shower.
- Loosen the jambs with a screwdriver and remove the bottom track.
- Scrape away all excess caulk.
Replacing Sliding with Hinged
Once the original door has been removed, you can follow the instructions from the above section to attach a new hinged one. When deciding to change to hinged, however, make sure to account for how far out the door will need to swing into your bathroom. They need plenty of clearance space, as opposed to sliding ones that work well in small bathrooms.
Replacing Shower Door with Curtain
While a curtain offers less heat retention than a glass door, it is versatile and cost-effective. In replacing with a curtain, follow the above steps for removal. Then do the following:
- Put the rod together as specified by the manufacturer.
- Determine the placement of the mounting brackets and install them.
- Install the rod and hang your new liner and curtain.
Adjusting Roller/Track
Worn-out rollers can be the culprit of a difficult door. To replace rundown rollers, follow these steps:
- Remove the door from its frame.
- Use a screwdriver to remove the old rollers. Clean the frame before installing the new ones.
- Insert the replacement rollers and screw them in place.
- Re-insert the door into its frame. This can be tricky to do on your own. It may be useful to enlist the help of a friend or local professional to make sure you get it done safely and successfully.
If it moves smoothly, the replacement was successful. If not, spraying some lubricant onto the roller track will likely resolve the issue.
Top Shower Door Brands
Delta
Delta offers a variety of sliding and hinged doors. When installing or replacing, they recommends that you make sure to:
- Read all the instructions completely before beginning.
- Read all warnings, care, and maintenance information.
- Purchase the correct water supply components.
You can then follow the instructions listed above to start using your new Delta product.
Kohler
Kohler’s unique designs are also available in sliding and hinged. They also offer several warranty options to protect your new framed door.
MAAX
MAAX has a wide selection of framed doors. If you run into an issue with a specific part, like the worn-out rollers mentioned above, you can purchase replacement parts from MAAX, too.
Sterling
Sterling Plumbing offers a low-maintenance coating on some of its doors to keep the glass looking great for years. This coating is available on both sliding and hinged options from Sterling.
Ready to start your Shower Door Installation?
Find ProsReturn to Top
Should You DIY or Hire a Pro?
Deciding to DIY or hire a pro can be a difficult decision. With shower doors, it truly depends on the nature of scope of the project. If it’s a simple fix (replacing a single part), DIY can be cost-effective choice. For more complicated projects, however, there are consequences to consider.
Pitfalls of DIY Jobs
There are a few things to think about before you commit to perform the installation or replacement on your own:
- Leaks—improper installation can lead to leakage that not only undermines the integrity of your flooring, but can also contribute to mold and mildew growth.
- Damaging the Door—accidents can chip, scratch, or crack a fragile piece of glass. For peace of mind, it may be in your best interest to hire a pro.
Cost to Hire a Pro
The cost to hire a professional varies depending on the region. Based on consumer-reported data, most homeowners pay between $500 and $1,400 for shower door installation.
 How to Install Frameless Glass Shower Doors
  How to Repair Chips & Cracks in Your Bathtub or Shower Pan
  How to Replace or Install a Bathroom Fan
  How To Clean Shower Doors
  3 Bathroom Remodels You Can Afford RIGHT NOW

Measuring bathtub enclosure for shower doors. All the doors I have found are either 58 1/2″
or 59 1/2″ high. My tub enclosure is only 57″ high. Can I make these work?