Using a sander can be simple or tricky. Depending on the size and complexity of your project, you may require the help of an expert. Use this guide to help you decide whether you’ll DIY or hire a guy.
Materials Required:
- Material to sand
- Heavy duty, all-purpose cleaner
- Safety glasses
- Sander: hand, orbital and/or belt
- Sandpaper: coarse or fine
- Rags
- Gloves
Sanding Steps:
- Choose the best sander for your project. A hand sander is a good choice for small projects like fixing up a piece of furniture, but you’ll need an orbital or belt sander for large projects like refinishing a wood floor.
- Select sandpaper with a texture appropriate for the surface you’re sanding. You’ll want a coarse grain for demanding projects like removing the finish from a wood floor. A fine grain is appropriate for smoothing surfaces with less varnish or stain.
- Start sanding. Going with the grain and using a circular motion, start your sander at one end of your material and work slowly and carefully to the other end. Make sure that you don’t miss any areas or stay in one spot too long.
HomeAdvisor Tip:
Start the sander on the material. Don’t turn it on before you start to sand.
Choose the Right Sander for Your Job
Many do-it-yourselfers are amazed to find they don’t have to be a professional to get good-looking results. It may take a little more time, but if a person is patient and follows the steps religiously, he or she can produce an arbor, rocking chair or bookshelf to take pride in.
In this modern age, there are still craftsmen that enjoy woodworking with traditional hand tools. For everyone else, there are excellent power tools that take the tedium out of sanding and shaping. The following tools are used for each part of the process.

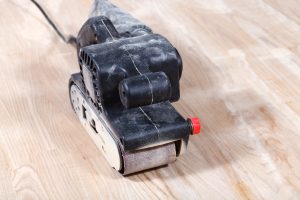
Belt Sander
The belt sander is the best tool to use for creating the shapes from the freshly-cut wood. With a very low grit on the order of 80, the sander will chew through wood. Some do-it-yourselfers try to accomplish this step with a lighter sander, but soon tire of the time it takes to get where they want to be.
When looking for a belt sander, pay particular attention to two things.
- The belt should be a standard size. This makes it easy to replace.
- The sander should have a good belt tracking system. Poor systems are frustrating because the belt tends to come off the roller with use.
Find out about these two things by checking online reviews for your choice of sander.
Once the project becomes roughed out, the woodworker can perform an intermediate shaping stage by replacing the 80 grit belt with something like a 220 grit. Note: when your 80 grit starts to wear to the point that it feels like a 220 grit to the touch, replace it.

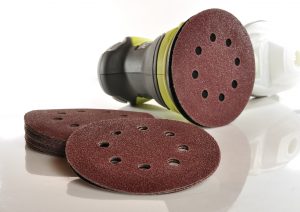
Orbital Sander
The shaped pieces are now ready for finishing with an orbital sander. Some woodworkers have had enough sanding at this point and are ready to skip to the finish. However, this step determines whether the finished product looks professional or not. Varnish or shellac will not be smooth on an unfinished surface.
Considerations When Using An Orbital Sander:
- Woodworkers generally start with a 220 grit. Once the surface is uniformly smooth, they switch to a 400 and work until the surface is even smoother.
- A craftsman does not want to leave any scratches showing the motion of the sander. So don’t lean on the sander or operate the machine with a large circular motion.
- Look at the surface to verify there are no scratches. If any remain, the finish will unfortunately highlight them and require refinishing the wood.
Random-Orbit Sander
Many prefer using a random-orbit sander for the finishing stage. The random-orbit sander not only vibrates but rotates as well. This makes it sand more quickly. However, it is important to operate this machine with a fine touch. In this way, it can give an even smoother finish than the orbital sander.
Other Sanders
For specialty work, other types of sanders are available. These include:
- Oscillating spindle sander – a sanding drum that moves up and down on a table. This is perfect for creating curves. Drum sanders also come for use with a power drill for freehand work. A popular drum size is 1” although there are many sizes available.
- Wood floor sander – this resembles an electric razor with a set of rotating disks – no sandpaper required. As the name suggests, it is perfect for finishing floors.
- Sandpaper holder – when the job absolutely requires hand work, a rubber holder is indispensable.
- Steel wool – often used on some types of wood as a final finishing step.
Remember, a professional-looking project is within your grasp if you master these powerful tools and choose the right one for each stage of the job.
No Comments Yet
Sorry, comments for this entry are closed at this time.

