On This Page:
- Understanding the Parts
- Step by Step Instructions
- Installing Popular Brands of Dishwasher
- Getting Help from a Pro
There are a variety of reasons you may be considering replacing an older dishwasher with a new model. It may be that wear and tear has made your current appliance less efficient than it once was. In some cases, it might be that the dishwasher you have is no longer doing the job of getting your dishes sparkling clean.
However, if it is over ten years old, you may want to consider replacing it even if it is still doing an adequate cleaning job. Energy Star dishwashers made over the last decade have a number of significant advantages over prior models. Here are just a few:
- Energy Star models save approximately 500 gallons of water per year, making them an environmentally-friendly choice.
- Newer dishwashers have soil sensor technology, which tests how dirty dishes are throughout the wash, adjusting the cycle to achieve optimum cleaning with minimum water and energy use.
- Improved water filtration on newer models removes food soils from the wash water, which largely eliminates the need for you to pre-rinse your dishes before loading them into the dishwasher.
- Water jets on newer models are typically more efficient.
- Newer models offer a variety of dish rack designs to accommodate different load types more efficiently.
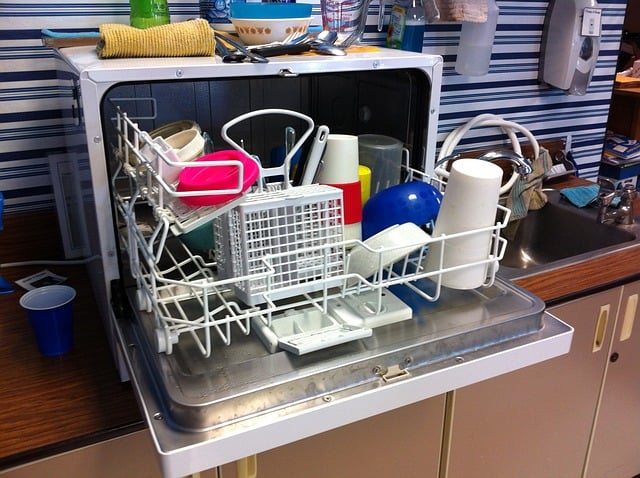
Understanding the Parts of Your Dishwasher
While newer models may be loaded with a lot of new technology, the good news is that when you are ready to install a new dishwasher, you will be dealing with the same basic setup that has been around for decades. You will be working with a water supply, a drain hose, and an electrical hookup.
This means that you can easily remove an existing dishwasher and replace it with a new one without having to do much more than simply breaking the existing connections and re-attaching new connections. You will likely not have to replace any of the electrical wiring. However, you may want to purchase a new power cord, which will likely not be included with your dishwasher.
As far as the hoses go, however, the new appliance will likely come with drain hoses, but you will need to purchase a supply line. Experts recommend that you buy a copper supply line, as copper is a time-tested material that stands up well. Alternately, you may choose a braided line. Braided lines contain rubber, which can eventually fail, leading to leakage down the line.
Measurements and Placement of Your Dishwasher
Modern dishwashers have adjustable legs so that you can easily fit them under existing countertops, adjusting for height as needed. However, when choosing a replacement, it is important to measure the width of the space under the counter to ensure that the replacement will slide seamlessly into your existing counter space without leaving significant gaps on each side.
Ready to start your dishwasher installation?
Find ProsStep by Step Installation Guide
Important: Before removing and replacing your dishwasher, please remember that you must disconnect the power to avoid electrical shock or injury.
While there are slight variations in the installation instructions for different models, the following steps outline generally how to install your new dishwasher.
1) When removing your new dishwasher from its box, use a box cutter or utility knife to cut the box away at the lines provided on the bottom of the box. This is important to protect the surfaces of the dishwasher and insulation from harm.
2) Remove all packing materials from around and inside the dishwasher, leaving any protective film over the door and handles until later to prevent any scratching during installation.
3) Gently turn your dishwasher on its side to give yourself better access to its outlets and plugs.
4) Remove the kick plate by detaching the screws on either side. Set aside screws and kick plate for later use.
5) Access the electrical junction box on the dishwasher and remove its cover. Insert your power cord, making sure that it snaps securely into place. Connect the wires from the motor to the wires in your power cord by matching the wire colors (green to green, white to white, and black to black), twisting like wire colors together, and capping each connection with a wire nut. Ensure that the wire nuts are all tightly attached.
6) Reattach the cover to the junction box, making certain that you do not pinch any of the wires in the process.
7) Locate the water supply line you purchased. Inside the package, you should find a 90 degree elbow which will match the inlet to your dishwasher. Wrap the threads on the elbow with Teflon tape and screw the elbow into the inlet. To prevent leakage problems, use a wrench to ensure that the elbow is screwed on tightly and that, in its final position, it is facing the back of your dishwasher.
8) Attach the supply line to the elbow. Do not over-tighten this line, as it has a rubber gasket. Ensure that the fit is secure, but not too tight. Set the dishwasher upright. Thread the supply line through the hole in your cabinet under the sink.
9) Get a towel and take the drain cap off the back. Do not be alarmed if water comes out. Dishwashers are routinely tested in the factory, and there may be some water in the drain from that process. Attach the new drain line to the dishwasher, crimp the clamp with pliers, and thread the line through the hole in your cabinet under the sink.
10) Carefully slide the dishwasher under the cabinet, taking care not to damage the insulation.
11) There should be ¼ to ½ inch from the top of the dishwasher door to the bottom of the cabinet. Use the adjustable screws to lengthen or shorten the legs. Ensure that both sides are level.
12) Once the dishwasher is level, attach the it to the bottom of the cabinet with the supplied screws.
13) Attach the water supply line to the hot water shut-off valve. Tighten with a wrench.
14) If you are connecting to a disposal unit, make sure the knockout plug has been removed before attaching the drain line. You will need to attach a hose clamp to the end of the drain hose to attach it securely to the disposal.
15) For proper operation, the drain hose must be looped up to the top of the cabinet and attached in the shape of an upside down U. To do this, wrap a loop of plumber’s strapping around the drain line with enough excess to match up a pair of holes. Hold the hose and strapping against the back of the cabinet so it makes an arc that is higher than the drain inlet. Using a screwdriver, attach the strapping to the cabinet wall.
16) Plug in your dishwasher and turn on the hot water. Run it through a short cycle to check for leaks under your dishwasher or your sink. Wait a sufficient time to ensure that no leaks are present. Meanwhile, it is safe to remove the protective film from the front at this point.
17) Once you have confirmed that there are no leaks and that the dishwasher is draining properly, reattach the kick plate with the screws provided.
Your dishwasher should now be ready for use. Remember to follow the manufacturer’s instructions regarding what to do to prepare before washing the first load of dishes, as these instructions vary from manufacturer to manufacturer.
Installing Popular Dishwasher Brands
While the instructions above include the general steps to install most dishwashers, there are some variations in the instructions depending upon the brand you are installing. Below are links to the installation instructions specific to some of the more popular brands:
Bosch: http://www.ajmadison.com/ajmadison/itemdocs/DW_ii(8-05)_Eng.pdf
KitchenAid: http://www.kitchenaid.com/customer-service/manuals/
Maytag: https://www.maytag.com/manuals
GE: http://www.geappliances.com/ge/service-and-support/literature.htm
Samsung: http://www.manualslib.com/brand/samsung/dishwasher.html
Getting Help from a Pro
Of course, if installing a dishwasher is not one of your dream projects, you might prefer to use the services of a professional to install it for you. In many cases, the store from which you purchased it may agree to install it for a fee. If that is not the case in your particular circumstance, you may have to look elsewhere for a pro to do the job. Always check to make sure any workman with whom you deal is licensed, bonded, and insured to protect your property and equipment.
 DIY Guide: Replacing a Washer Pump
  Garbage Disposal Cleaning: Show Your Garbage Disposal Who Is Boss
 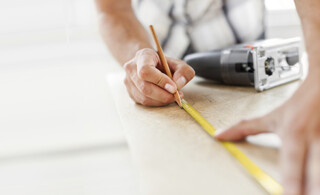 Fix-It 101: The Fix-It Literacy Guide
  Green Building Glossary
  Checklist: Caring for Your Appliances

Are You Familiar With This Topic? Share Your Experience.