On This Page:
- How to Install an Attic Gable Fan
- Roof Vent Exhaust Installation
- Best Place to Install
- How to Install a Whole House Fan
- DIY vs. Hiring a Pro
Attic Gable-Mounted Fan Installation
Gable-mounted installations are the simplest to perform, especially if there is already a gable vent in place. You or your installer can perform the following steps from the interior without having to work from the outside. Be sure to consult the fan’s owner’s manual for measurements and details.
- Prepare the opening.
- If an accurately sized gable vent already exists, proceed to step two.
- If the current gable vent is too small for the fan:
- Remove the under-sized shutter and use your new shutter to mark the edges for cutting.
- Clear obstructions like framing and lap siding.
- Cut the new edges using a sabre saw.
- Secure new shutter with screws and use caulk to seal the new perimeter.
- Create a mounting panel using plywood.
- Make sure the plywood will fit the framing around the shutter.
- Your fan should come with a cutout to mark the hole size for the fan. Use this guide to make your hole in the plywood, then cut with a sabre saw.
- Center and set the fan in the plywood, and screw the mounting bracket to the plywood.
- Secure the fan to the gable wall.
- Center the assembly behind the shutter and secure to the framing with nails.
- Attach the included thermostat to a corner of the plywood mount.
- Wire the fan.
- Double-check that the power to the circuit you’ll be connecting to is off.
- Connect the thermostat to the existing or designated circuit using an electrical cable, connecting the correct circuit wires in both the thermostat and the circuit. Be sure to secure the cable using staples, so that it isn’t running loosely through the attic.
NOTE: For wiring, it’s best to hire an electrician. These pros will know and understand your local codes and voltage/amp requirements.
Ready to start your Attic or Whole House Fan Installation?
Find ProsReturn to Top
Replacing an Existing Fan
The cost of attic fan replacement is typically about $600 when you hire a professional. Replacement is necessary if the major elements of the fan fails. Replacing the motor will sometimes be sufficient and will only cost around $200 for labor. In the case of total failure, your pro will perform the following steps.
- Cut off the power supply.
- Disconnect the wiring to the thermostat.
- Detach the existing fan unit.
- Attach the new fan (resize the hole to fit, if necessary).
- Attach and wire the new thermostat.
Roof Vent Exhaust Installation
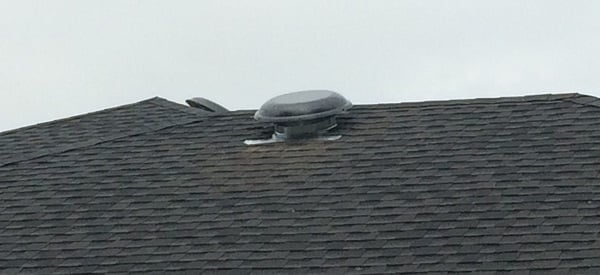
When it comes to installing a fan in your roof, you will need to work from both the inside and the outside. It is best to hire a roofing professional, as this type of work is dangerous and the proper handling of roofing and shingles is vital to leak prevention. If you do DIY, use proper safety precautions, especially when handling electricity.
Keep in mind that roof vents should be installed near the ridge, peak or highest point of the roof for optimum performance. Also, regardless of your aesthetic preferences or any future plans you may have, you must follow proper procedure with lifting and replacing the shingles and flashing. Otherwise, you risk leaks and water damage.
- Mark your center.
- Measure around 20 inches down from the ridge and mark a center between the joists.
- Drive a dowel or nail as a marker through this center, to show center on the roof.
- Cut and remove immediate shingles.
- On roof, mark a circle around the dowel which matches the measurements needed for the fan’s flashing. This circle will be wider than the circle you will cut.
- Cut the measured circle in the shingles using a utility knife and remove surrounding shingles temporarily.
- Cut your airway.
- Mark a circle on the roof which will fit between the joist (do not cut your joists!).
- Cut this hole through the roof.
- Install the vent.
- Secure the vent to the roof using roofing cement around the edge of the circle, applied directly to the roof.
- Secure fan with screws.
- Seal the flashing.
- Apply caulk to the edges of the flashing to block out moisture.
- Replace and secure shingles.
- Wire the fan.
- Perform any necessary wiring as described for gable-mounted fans above. This will not be necessary for solar, and some electrical fans come with simple plugs rather than wires.
Where Should You Install Your Attic Ventilation Fan?
The benefits of gable and roof ventilation fans are relatively similar. Where you install your unit is up to aesthetic preference and budget.
Roof
- May come at a greater cost, considering that shingles must be moved and a hole created.
- Requires work from the outside, on the roof.
- With be visible on the roof and may not meet preferred aesthetics.
Gable
- May be more cost-effective if you already have a gable vent in place.
- May be closer to an available outlet.
- Does not require work from outside, which makes for easier installation.
Ready to start your Attic or Whole House Fan Installation?
Find ProsReturn to Top
Whole House Fan Installation
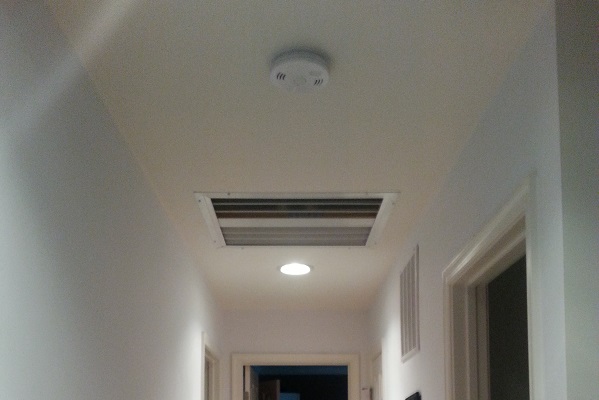
Installing this system is a job for a pro. The process requires measurements, wiring and the creation of new vents. Improper installation can result in backdrafts, pulling air from your furnace, water heater, or gas appliances. Without enough ventilation, this can allow dangerous combustion toxins like carbon monoxide into the living space.
A licensed, experienced professional will put in a tight-sealing winter cover and provide an access door, so the homeowner can switch between heating and cooling methods easily. The HVAC service professional will also calculate attic ventilation requirements to maximize cooling and energy efficiency.
A professional will perform the following steps for the fan itself, not including the installation of added ventilation where necessary:
- Prepare the framing.
- Remove plywood and insulation from installation area, which should ideally be in a central hallway. Whole house fans are sized to fit between the joists of your attic.
- Install two 2 x 10 boards as a frame for the fan between joists. Be sure to leave a little bit of “wiggle room” for the fan. Secure with nails.
- Re-install plywood and cut a square along your framing both in the plywood and the ceiling.
- Insulate and weather-strip.
- Spray insulation in the gaps between attic and ceiling.
- Apply weather-stripping to fan where it will rest on the plywood.
- Install the fan.
- Set fan in the frame and secure with screws.
- Secure the grill to the hallway side of the installation.
- Connect to an electrical outlet.
- You may need to have a designated outlet installed if one is not available and in range.
DIY Fans vs. Hiring a Pro
Professional attic fan installation costs less than $600, on average. Labor is a small fraction of the total, which makes hiring a pro an affordable and worthwhile option. At that cost, you are receiving a quality installation that is up-to-code as far as electric, and which performs at optimum capacity. You will be properly informed and your installer will be able to help you find the best equipment for your needs. A pro will be able to quickly execute the work in a single day. DIY is not recommended for any electrical, roofing or solar work.
Ready to start your Attic or Whole House Fan Installation?
Find ProsReturn to Top
 Ceiling Fan Installation
  Baseboard Heating Options & Benefits
  Forced Air Heating Systems – How They Work & Options
  Whole House Humidifiers
  Choosing Green: Boilers and Radiator Heating Systems

Are You Familiar With This Topic? Share Your Experience.